

Essential Tips for Selecting the Perfect Paint Color
June 12, 2025Residential Painting for New Beginnings
June 26, 2025
Tips for successfully tackling a large painting project involve careful planning and execution. By thoroughly assessing your space, selecting the right materials, and devising a comprehensive timeline, you can avoid potential pitfalls that lead to wasted time and resources. Ensure you take the necessary precautions to protect your furniture and flooring while also investing in quality tools that can make a significant difference in the outcome. With the right approach, you’ll not only enhance your environment but also find satisfaction in completing a project that reflects your style.
Key Takeaways:
- Establish a clear vision and budget for your painting project to guide your decisions and planning process.
- Gather all necessary supplies and tools in advance to ensure a smooth workflow and minimize interruptions.
- Consider the timing of your project, including weather conditions and personal schedules, to achieve the best results and efficiency.
Defining Your Vision: Crafting the Perfect Concept
Identifying the Purpose and Theme
Begin your project by pinpointing the primary purpose and overarching theme you wish to convey. Whether it’s a tranquil landscape for relaxation, a vibrant mural to energize a space, or a statement piece that showcases your artistic prowess, understanding the intent will guide your decisions. Ask yourself how the artwork will interact with the environment and what emotional responses you want to evoke in the viewer.
Selecting a Color Palette that Resonates
The right color palette is vital in enhancing your theme and energizing your message. Take time to explore colors that resonate with your vision; consider both complementary shades that create harmony and contrasting tones that draw interest. Websites like Adobe Color or Coolors can help you experiment with palettes that strike an emotional chord and enhance your overall aesthetic.
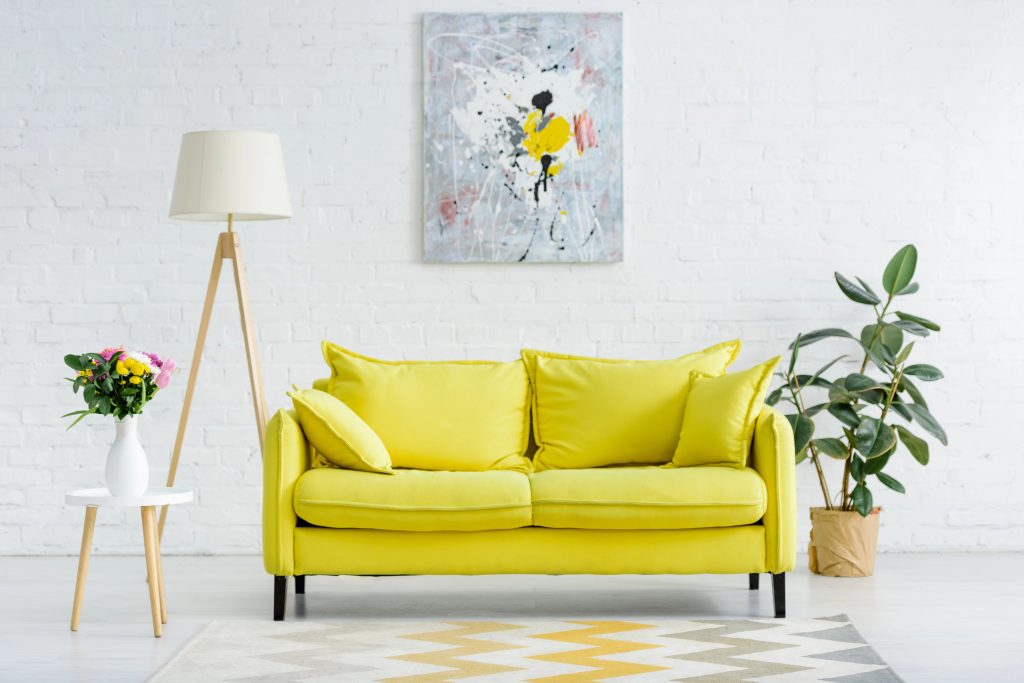
Using a well-thought-out color palette can significantly impact the mood of the space. For example, soft blues and greens often promote calmness, making them perfect for serene areas like bedrooms, while bright yellows and oranges can evoke happiness and creativity in workplaces or studios. Furthermore, tactile color samples can help you visualize the final composition in the intended setting, ultimately leading to a more cohesive end result. Incorporating visual tools like mood boards can also clarify your color choices and keep your vision on track throughout the project.
Budgeting Your Big Canvas: Mastering the Financials
Estimating Material and Labor Costs
Establishing a realistic budget begins with accurately estimating both material and labor costs. You’ll need to consider the type of paint, brushes, rollers, and protective gear, as well as the price of any additional materials like tarps or drop cloths. If you’re hiring professionals, factor in their hourly rates or flat fees, which can massively vary depending on your location. A good approach is to obtain quotes from multiple contractors to gauge a reasonable labor cost and ensure you’re not underestimating expenses.
Allocating Contingencies for Unforeseen Expenses
Setting aside a portion of your budget for unforeseen expenses can safeguard against unexpected costs. Aim for a contingency of 10-15% of the total project estimate to account for any surprises, whether it’s additional paint needed for touch-ups or minor repairs to surfaces that could arise during the project.
Projects can often reveal hidden issues that weren’t initially apparent, such as mold, damaged walls, or mismatched paint colors that require additional purchases. Allocating funds for these contingencies not only provides peace of mind but can also prevent frustrating delays. For instance, if you budget $2,000 for your project, setting aside $200 to $300 could mean the difference between finishing on schedule and needing to halt work due to financial constraints. Having that cushion allows you to focus on the creative aspects of your project instead of worrying about extra costs derailing your timeline.
Gathering Your Arsenal: Tools and Materials You’ll Need
Essential Painting Supplies: Beyond the Basics
To effectively tackle your large painting project, go beyond the standard paint and brushes. Invest in high-quality painter’s tape, drop cloths to protect your floors and furniture, and a sturdy ladder to reach those higher places easily. Consider a paint sprayer for an even application over large areas, and make sure you have caulk for filling gaps and cracks. These necessary supplies set the foundation for a successful painting experience.
Choosing the Right Brushes, Rollers, and Techniques
Your choice of brushes and rollers can significantly impact the finish of your paint job. Different surfaces and types of paint require specific tools for the best results. For instance, a 3/8-inch nap roller is ideal for smooth surfaces, while a 1-inch brush is perfect for cutting in around edges. Techniques like back-rolling can help ensure an even distribution of paint, especially in textured areas. Selecting the right tools and mastering these techniques elevates your project from ordinary to exceptional.
When exploring brush and roller options, keep in mind that synthetic brushes work best with water-based paints, while natural bristle brushes are well-suited for oil-based paints. Rollers are available in various nap lengths; longer naps are ideal for textured surfaces, while shorter naps deliver a smoother finish. Experimenting with different applying techniques, such as ‘W’ patterns for rollers, can enhance coverage and minimize streaks, ensuring your large area receives a consistent, polished appearance.
Executing a Strategic Timeline: Scheduling Your Project
Breaking Down the Phases of Your Project
Divide your painting project into manageable phases to streamline your workflow. Consider breaking down the process into preparation, painting, and finishing touches. For example, dedicate a few days to prepping the surfaces, followed by a couple of weeks for the actual painting, and finally, give yourself some time for any necessary touch-ups and drying. This systematic approach not only organizes your efforts but also helps you track progress effectively.
Prioritizing Tasks for Efficiency and Effectiveness
Focus on a strategic order when scheduling your tasks. Begin with cleaning and priming surfaces before moving on to painting. Tackling the largest areas, like walls, first creates a solid foundation, while final details such as trim and touch-ups can happen later. Breaking tasks into smaller segments lets you maintain momentum, making it easier to fit painting sessions into your schedule.
Consider the potential delays that could arise and compensate by prioritizing tasks that can be done simultaneously, like prepping while waiting for paint to dry. Additionally, weekends or evenings may offer longer, uninterrupted time frames to make substantial progress. Being organized and flexible allows you to adapt if complications arise, ensuring you stay on track towards completion.
The Power of Preparation: Setting Up Your Workspace
Organizing Your Area for Optimal Workflow
To maximize efficiency during your painting project, focus on optimizing your workspace. Clear a designated area where you can lay out all your tools and materials, ensuring everything is within arm’s reach. Use sturdy tables or platforms for larger items, and keep smaller supplies like brushes and tape in easy-to-access containers. Establish a systematic workflow by arranging tools in the order they’ll be used, which cuts down on back-and-forth movement. Incorporate good lighting to illuminate all corners of your workspace, allowing you to work precisely and efficiently.
Ensuring Safety and Protection: What You Must Consider
Protecting your health and safety during a large painting project requires planning. Wear appropriate protective gear, such as gloves, goggles, and a mask to guard against fumes and dust. Additionally, keep your workspace clean and organized to minimize the risk of accidents. Ensure adequate ventilation in your area, especially when working with chemicals or spray paint, to reduce exposure to harmful substances. Conduct a thorough assessment of your workspace for any potential hazards, like uneven flooring or electrical cords, and address these to maintain a safe environment.
Ventilation is particularly important in enclosed spaces, as paint fumes can pose health risks. Open windows, use fans, or consider an air purifier to keep the air fresh. If you’re working with oil-based paints or solvents, investing in a quality respirator can provide extra protection. Additionally, familiarize yourself with the Material Safety Data Sheets (MSDS) of the paint and materials you’re using, as they provide valuable information on safe handling and first aid measures in case of exposure. Prioritize your safety to ensure a successful and enjoyable painting experience.
Navigating Common Pitfalls: Avoiding Project Mistakes
Six Reasons Large Painting Projects Go Awry
Large painting projects often falter due to a lack of preparation, inadequate budgeting, poor time management, incorrect color choices, improper surface preparation, and using low-quality materials. Each of these pitfalls can lead to unsatisfactory results, wasted resources, and even safety concerns. Remaining vigilant against these common issues will keep your project on track and your vision intact.
Pro Tips from Industry Veterans on Staying on Track
Staying organized is key to the success of your painting project. Industry veterans suggest drafting a detailed timeline with deadlines for each phase, from prep work to final touch-ups. Engaging a small team to delegate tasks can drastically reduce your workload and keep morale high. Frequent check-ins help maintain focus and address concerns as they arise. Knowing when to adjust your plan or timelines based on real-time feedback is imperative for ensuring a successful outcome.
- Draft a detailed timeline for each project phase.
- Engage a small team to share the workload.
- Hold frequent check-ins to maintain focus.
- Be open to adjustments based on progress.
Incorporating insights from industry professionals can elevate your execution. They recommend starting with a detailed checklist of tasks, ensuring that everything from surface preparation to cleanup is accounted for. Using this list as a guide helps you track progress and identify potential roadblocks before they escalate. Ensuring that all team members understand their roles and responsibilities enhances workflow and efficiency. Knowing this will lead to a smoother painting process overall.
- Create a detailed checklist for all tasks.
- Track progress to prevent roadblocks.
- Clarify roles and responsibilities for all team members.
- Maintain open lines of communication throughout the project.
The Finishing Touch: Techniques for a Professional Finish
Final Inspections and Touch-Ups—What to Look For
After completing your painting project, conduct a thorough walk-through of the space, paying attention to any uneven edges or missed spots. Look for signs of drips or roller marks, especially in corners and along trim. Using a bright light will help highlight imperfections that may be less visible in ambient lighting. Keep paint on hand for touch-ups; a small brush works well for those tricky areas, ensuring that the final result is clean and professional.
Embracing Creativity Post-Paint: Adding Personal Flair
Once the paint has dried, inject your personality into the space with decor. This can be achieved through art, textiles, and accessories that reflect your style. Choose contrasting colors that complement your new palette, or themed decor that ties the room together. Incorporating elements like wall hangings, throw pillows, or even furniture can create a cohesive look that enhances the atmosphere you envisioned from the outset.
Adding personal flair doesn’t stop with just decor. Consider creating a gallery wall using framed artwork or photographs, which can serve as a striking visual centerpiece. You could also experiment with stenciling or wallpaper sections of a wall to add depth and interest. Even small touches, such as unique light fixtures or vibrant houseplants, can dramatically transform the ambiance. This is your chance to truly make the space reflect who you are and what inspires you, showcasing your artistic expression beyond just the paint itself.
Documenting Your Journey: Capturing the Process
Photography Tips for Showcasing Your Work
Capturing your painting process is necessary for engaging your audience effectively. Use natural light to enhance the colors and details of your work, and adjust your framing to focus on significant elements. Experiment with different angles and perspectives to showcase your unique techniques. Ensure your camera settings are optimized for clarity, especially if you’re using a smartphone. Regularly share updates to maintain interest and create a narrative around your artistic journey. Thou must not overlook the power of good photography to elevate your art and connect with your viewers.
Writing About Your Experience: Engaging Your Audience
Sharing your personal narrative throughout the painting project allows your audience to connect with you on a deeper level. Focus on telling stories about the challenges, moments of inspiration, and breakthroughs you experienced while creating each piece. Discuss the techniques and materials you used, as well as your thoughts and emotions during the process. Highlighting specific milestones, such as completing intricate details or overcoming creative blocks, can make your account more relatable. Being transparent about your journey not only resonates with others but also builds a community interested in your artistic evolution. Enthusiasm in your writing helps foster engagement and encourages ongoing conversations with your audience.
Final Words
Planning a large painting project can feel overwhelming, but with the right approach, it’s a manageable and rewarding process. By using these tips, you’ll be better prepared to tackle your project efficiently and achieve stunning results. If you’re looking for expert help to bring your vision to life, Frederick Painting is here to make the process seamless and stress-free. Contact us today to discuss your project, and let’s work together to create a space you’ll love!
FAQ
Q: What are the first steps I should take when planning a large painting project?
A: When starting a large painting project, it’s important to begin with thorough planning. First, assess the area to determine what exactly needs to be painted. Measure the dimensions to calculate the total square footage, which will help you estimate the amount of paint required. Next, choose your color palette and gather inspiration from design magazines or websites to visualize your desired outcome. Additionally, consider the time frame for the project, setting realistic goals for completion based on your availability and any potential weather conditions if the project is outdoors.
Q: How can I ensure that I have all the necessary materials for my painting project?
A: To avoid last-minute trips to the store, create a comprehensive list of materials you’ll need before starting. This should include paint, brushes, rollers, painter’s tape, drop cloths, ladders, and any protective gear. Consider opting for high-quality supplies, as they can make a significant difference in the final result. Additionally, if the project involves multiple colors, organize a plan to avoid confusion during the painting process. By gathering all materials beforehand, you create an efficient workflow and minimize interruptions.
Q: What tips can help with the execution of a large painting project to ensure a professional finish?
A: Achieving a professional finish requires attention to detail and proper technique. Start by preparing the surfaces; this includes cleaning the walls, repairing any damage, and applying a primer if needed. Use painter’s tape to create clean lines around edges and trim. When applying paint, consider using a roller for larger areas and a brush for corners and edges for a smooth application. Work in small sections to maintain consistency in texture and color. Finally, allow adequate drying time between coats, and inspect for any areas that may need touch-ups before the final inspection.

Shawn Zimmerman started painting in the summer of 1991, the year before he graduated high school. Shawn decided to pursue his career in the family business and continued to develop his skills in the trade while also developing the necessary skills to manage the business. Shawn enjoys being outdoors, canoeing, camping, hiking, hunting, fishing and spending time with family.
