
Eco-Friendly Approaches to Painting
May 14, 2025
How to DIY the Antique Paint Look
May 28, 2025
It’s not just about slapping paint on the walls; achieving a professional finish requires understanding specific tools and techniques. You can transform your interiors beautifully and efficiently by mastering how to prepare your space properly, selecting the right brushes and rollers, and applying paint with expert precision. You’ll also learn to avoid common pitfalls like streaks or uneven coverage that can ruin your project. This guide will empower you to paint like a pro, ensuring your walls look flawless and your hard work lasts for years.
Key Takeaways:
- Investing in high-quality brushes, rollers, paints, and primers ensures a smoother finish and longer-lasting results.
- Proper room preparation, including clearing space, repairing wall imperfections, and cleaning surfaces, enhances paint adhesion and overall appearance.
- Mastering techniques such as cutting in, brush loading, and using the right rolling patterns helps achieve clean edges and even coverage.
Essential Tools and Materials for Professional-Quality Painting
You need to start with the right tools and materials to achieve a professional-quality paint job. Investing in high-quality brushes, rollers, paints, and primers lays the foundation for durable, smooth results that stand the test of time. Your choice of these necessary tools directly impacts the finish and longevity of your work.
High-Quality Brushes and Rollers
Behind every smooth coat of paint is a carefully chosen brush or roller. A good brush, often priced between $15 and $25, with synthetic tapered bristles and flagged tips, gives you better control and a finer finish. You’ll want a 2 to 2.5-inch angled brush for precise edging and detail work. A 9-inch roller with a medium 3/8-inch microfiber cover ensures even coverage and a professional look for larger surfaces.
Professional-Grade Paints and Primers
About the paints and primers you select, opting for professional-grade products makes a noticeable difference. Glossier paints offer stain resistance but require careful application as they can highlight brush or roller marks. An eggshell finish is often ideal for balancing durability and cleanability in most rooms. Primers seal stains and create an even base, and tinted primers help when covering darker colors, which means fewer coats for you.
For instance, primers with high-quality sealing properties improve paint adhesion and reduce the risk of peeling over time. Using a primer tailored to your surface can speed up your project by reducing the number of paint layers needed. Additionally, selecting paints with mold and mildew resistance is smart for bathrooms and other moisture-prone spaces.
Specialized Painting Equipment
Professional-grade painting isn’t just about brushes and rollers; specialized tools make your job easier and cleaner. Using a roller grid inside a 5-gallon bucket minimizes splatters and eliminates constant paint refills, while painter’s poles give you extended reach for ceilings and high walls. A dripless caulk gun helps you achieve a clean and precise seal for tight spots like molding or door frames.
Plus, these tools reduce strain and mess during your project. The roller grid system limits paint waste, while the dripless caulk gun controls material flow, preventing unsightly drips on your finished surfaces. Equipped with the right gear, you’ll make your work more efficient and maintain a professional-quality result.
Proper Room Preparation Techniques for Painting
One of the first steps toward achieving a professional paint job is thorough room preparation. Taking the time to clear and protect your space, address any wall imperfections, and clean surfaces properly sets the foundation for flawless results and long-lasting durability.
Clearing and Protecting the Space
Among the essential tasks in prepping your room is clearing out furniture and belongings as much as possible to avoid stains. If you cannot remove everything, cover items with plastic tarps or canvas drop cloths. Protect floors with canvas or paper-backed plastic cloths—these are better at absorbing spills and preventing paint from seeping through your floor.
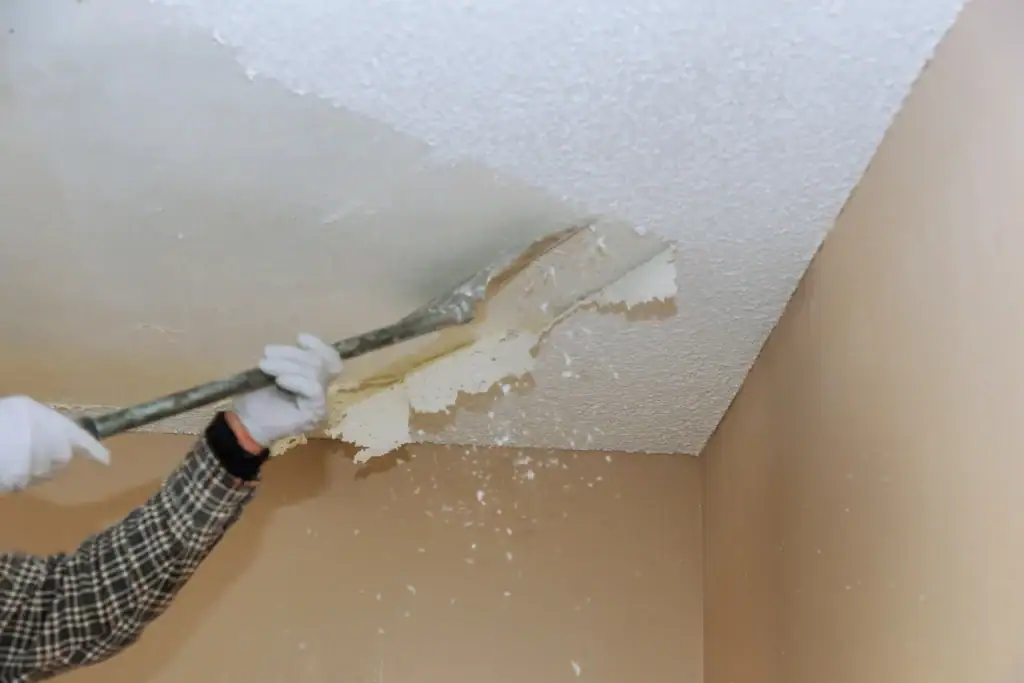
Addressing Wall Imperfections
A crucial step before painting is fixing any cracks, dents, or holes in your walls. Use materials like spackle, putty, or wood filler to repair damaged areas, then sand these spots smooth to create an even surface that will enhance paint adhesion and appearance.
Considering the nature of your wall’s damage, apply appropriate fillers and allow them adequate drying time. Sanding after filling eliminates bumps and rough edges, which can show up under the paint as unwanted texture or shadows, undermining your desired clean finish.
Cleaning Surfaces for Optimal Paint Adhesion
Washing walls with a trisodium phosphate (TSP) solution removes dirt, grease, and residues that inhibit paint from sticking well. For stubborn stains, such as smoke damage, bleach solutions are effective for cleaning and sanitizing the surface, ensuring your paint applies smoothly and lasts longer.
It is important to note that dirty or greasy walls can cause peeling or uneven paint coverage. Taking extra time to clean your surfaces thoroughly will help you avoid these issues and result in a more durable, professional-looking paint job that stands the test of time.
The Art of Cutting In: Achieving Crisp Lines and Edges
Unlike broad wall painting, cutting in involves carefully painting the edges and corners of your room to create clean, sharp lines that define the overall finish. This technique requires precision and control, ensuring that your paint lines don’t bleed onto surfaces like trim, ceilings, or adjoining walls. Mastering this skill significantly elevates the professional appearance of your project.
To get started, you’ll want to use a 2 to 2.5-inch angled brush, which professionals prefer for edging and detail work due to its ability to provide better control and smoother application. When cutting in, hold the brush properly—dip it about two fingers deep into your paint, then wipe off any excess on the side of your paint bucket. This prevents drips while helping you make even strokes along edges.
Start lower on the trim or wall area and work gradually up to the edge, maintaining a steady hand as you move. This natural flow helps establish a precise boundary between painted surfaces without the need for painter’s tape. Although painter’s tape can still be helpful, especially for beginners, developing your cutting-in technique will save you time and provide a more refined finish once practiced.
The key to success in cutting is doing your work with smooth, deliberate strokes while minimizing excess paint buildup at the edges. Avoid overloading your brush; thick paint can cause dripping and uneven lines. Instead, focus on gradually layering paint, enhancing durability, and overall appearance.
With some practice, you’ll find that cutting in enables you to achieve those crisp, professional-quality edges that separate average DIY painting jobs from expertly finished rooms. When combined with the right tools and proper brush handling techniques, your walls will have flawless borders that elevate the entire space.
Mastering Brush Techniques for Flawless Results
Not all brushwork is equal when it comes to achieving a professional paint finish. To reach that level, you must master how to load your brush properly and adjust your technique for different surfaces. These skills will help you avoid drips, streaks, and uneven coverage, making your interior painting project more successful.
Proper Brush Loading and Application
When loading your brush, dip it two fingers deep into the paint and gently wipe off the excess on the bucket’s side to prevent drips. Applying paint with smooth, upward drag strokes rather than downward pushes helps you avoid pooling and ensures an even coat that looks clean and professional.
Techniques for Different Surface Types
You should adapt your stroke direction and pressure when working with various surfaces. Always follow the grain for wood surfaces to maintain texture and avoid brush marks. When painting joints or panels, use full strokes lightly dragged toward the grain to smooth out the paint and eliminate uneven brush strokes. The right approach creates a more uniform look and a longer-lasting finish.
To further understand the best techniques for surfaces, consider the following:
| Surface Type | Recommended Brush Technique |
|---|---|
| Wood Grain | Follow the grain with long, smooth strokes |
| Panels and Joints | Use light, full strokes across panels, dragging toward the grain |
| Smooth Drywall | Use even, short strokes to minimize brush marks |
| Textured Surfaces | Apply paint with a stippling or dabbing motion |
| Trim and Edges | Use angled brushes with steady, precise strokes |
In addition to adjusting your brush strokes, pay close attention to the type of brush bristles you use for each surface and the amount of pressure applied. Soft synthetic bristles work well on smooth surfaces, while stiffer bristles are suited to rougher textures. You should also be careful not to overload the brush, which can cause drips and uneven drying. The right combination of these elements will ensure your paint job is flawless and professional-looking every time.
- Use the proper brush type for your surface to maximize coverage
- Apply consistent pressure to avoid streaks or blotchy areas
- Follow natural material texture (e.g., wood grain) to preserve appearance
- Control paint load to prevent drips and pooling
- The finishing touch is steady, confident strokes for smooth results
Roller Techniques for Smooth, Even Coverage
All rollers can help cover large surfaces, but mastering the proper techniques makes your finish smooth and professional. Choosing the correct roller nap and using effective rolling patterns will save you time and reduce uneven streaks or marks. Applying paint evenly with a roller ensures your walls look flawless and reduces the need for touch-ups later.
Choosing the Right Roller Nap
Coverage depends largely on selecting the proper roller nap for your surface. Shorter naps, usually under 3/8 inch, are best for smooth walls, helping you achieve a sleek, even finish without excess texture. Longer naps hold more paint and are ideal for rough or textured surfaces, but can leave a stippled look on smooth walls. The recommended medium 3/8-inch microfiber roller cover is often the best balance for most interior walls.
Proper Rolling Patterns for Walls and Ceilings
Coverage is much more uniform when you work in small sections, roughly 3 to 4 feet square, using the “W” rolling pattern. This zigzag technique helps spread the paint evenly before filling in the gaps, minimizing lap marks or color variations as the paint dries. Blending each section while the paint is wet is key to a seamless finish.
Roller technique extends beyond basic patterns. Using consistent pressure throughout and overlapping your strokes gently ensures no section dries unevenly or leaves visible lines. Working systematically across your walls allows you to maintain a wet edge, preventing unsightly roller marks or patchiness. For ceilings, using an extension pole can help you maintain better control and reduce fatigue, while back-rolling with a dry roller after application evens out the coat, enhancing durability and visual appeal. Adopting these practices will elevate your work from average to truly pro-level results.
Pro Tips for Painting Tricky Areas
Despite seeming simple at first, painting tricky areas like windows, trim, doors, and cabinets requires specific approaches to achieve a flawless finish. Proper techniques and preparation can save you time and avoid common pitfalls such as uneven coverage, drips, and streaks. Here are some professional tips to help you master these challenging spots:
- Paint trim before walls to simplify taping and corrections
- Remove hardware when painting doors or cabinets for smooth access
- Use angled brushes for tight corners and detailed areas
- Work in small sections to maintain wet edges and avoid lap marks
- Proper sanding and cleaning ensure your paint adheres well and lasts
Windows and Trim
Among the best strategies, painting windows and trim early in the day gives your paint enough time to dry before closing windows at night, preventing damage. It’s also easier to apply painter’s tape around trim and paint it first, allowing you to touch up any wall or ceiling paint spills afterward. Using a 2 to 2.5-inch angled brush helps you maintain control and create smooth, crisp edges.
Doors and Cabinets
Among the professional methods, removing hardware from doors and cabinets allows you to clean, sand, and paint evenly without obstruction. When painting doors, start with the panels and then move to the stiles and rails. Removing and painting doors separately from cabinets is best to ensure complete coverage and a polished look.
In addition to thorough preparation, you should consider sanding between coats to enhance paint adhesion and smoothness. High-quality brushes or rollers tailored for cabinets and doors can help avoid brush marks and streaks. Applying two coats of paint for durability and an even finish is common among pros, and letting each coat dry fully reduces the risk of peeling or cracking. This approach allows you to achieve a professional-quality result that matches daily wear.
Final Words
Considering all points, mastering interior painting techniques like a pro requires understanding the right tools, preparation methods, and application skills. You can achieve a professional-looking finish by selecting quality brushes and paints, preparing your space correctly, and practicing precise brush and roller techniques. Your attention to detail and patience during each step will ensure your paint job is smooth, durable, and visually appealing, making your space look refreshed and expertly finished.
FAQ
What brush is best for achieving smooth edges when painting interior walls?
A 2—to 2.5-inch angled brush with synthetic bristles is highly recommended for crisp edges and detail work. Synthetic bristles work well with water-based paints, and the angled shape provides better control for precise cutting along trim and corners.
How can I prevent streaks and uneven coverage using a roller?
Use the proper rolling pattern to avoid streaks and lap marks by working in small sections about 3 to 4 feet square. Applying paint in a “W” or zigzag pattern and filling it in helps evenly distribute the paint. Also, blending each section while the paint is wet ensures a smooth, consistent finish.
How should I prepare surfaces before painting for long-lasting results?
Clean the walls with a trisodium phosphate (TSP) solution or bleach mixture to remove dirt, grease, or stains. Then, repair any cracks, dents, or holes using spackle or putty, and sand smooth once dry. Proper surface preparation helps the paint adhere better and creates a uniform surface for painting.

Shawn Zimmerman started painting in the summer of 1991, the year before he graduated high school. Shawn decided to pursue his career in the family business and continued to develop his skills in the trade while also developing the necessary skills to manage the business. Shawn enjoys being outdoors, canoeing, camping, hiking, hunting, fishing and spending time with family.


