Frederick Painting | Spring Cleaning for Your Walls: How to Maintain Interior Paint Like a Pro
July 8, 2025
Why Cabinet Painting Is a Cost-Effective Renovation Solution
August 5, 2025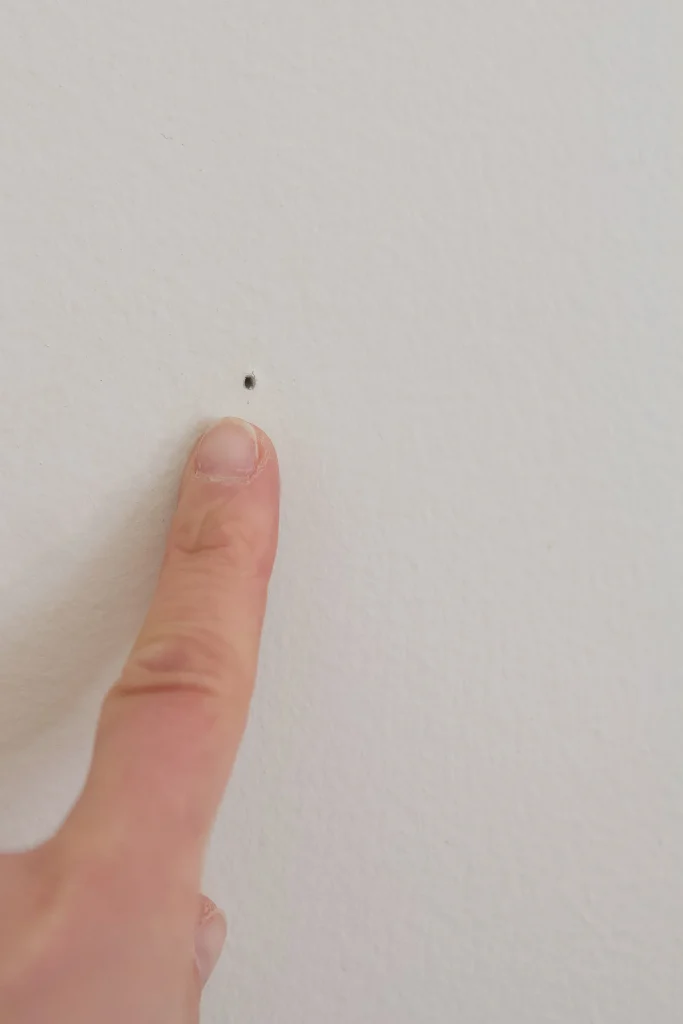
Patch nail holes and dents effectively to ensure your walls look flawless before you repaint. By addressing these imperfections, you avoid uneven paint finishes and create a smooth, professional surface. You’ll learn simple techniques to fill and sand holes quickly, using supplies you likely already have on hand. Taking these steps guarantees your new paint job not only looks fresh but lasts longer without peeling or cracking. Follow this guide to transform your walls and boost your home’s appearance with confidence.
Key Takeaways:
- Remove the nail carefully from the wall using your fingers or the backside of a hammer before starting the repair process.
- Fill small nail holes with spackle using either an all-in-one tool or your finger. Apply the spackle sparingly and smooth out any excess to ensure a clean finish.
- After the spackle dries, gently dab matching paint over the patched area with a paper towel to blend it seamlessly into the wall, avoiding heavy brushstrokes that can highlight the repairs.
Essential Materials for Smooth Repairs
Must-Have Tools for Drywall Fixes
You’ll want a reliable putty knife—ideally one with a flexible blade around 2 to 3 inches wide—to spread filler smoothly. A fine-grit sanding block or sandpaper (150-220 grit) helps blend patch edges flawlessly with the surrounding wall. Having a small container or mixing tray is handy if you’re working with powdered joint compound. And, of course, keep a damp cloth or sponge nearby to wipe off excess filler before it dries. These simple tools make your drywall repairs easier and more professional-looking.
Choosing the Right Filler Material
The filler you choose can make a big difference. The pre-mixed spackling paste is excellent for quick fixes, such as those tiny nail holes, offering easy application and fast drying times. For dents or slightly larger imperfections, the lightweight joint compound provides a smoother finish but takes longer to dry. If the wall has texture, look for setting-type compounds that harden faster and can be sanded to match. Using the right filler ensures your patched spots won’t become visible after repainting, keeping your walls flawless.
When selecting filler materials, consider the type of wall and the extent of the damage. For most standard drywall nail holes, a light spackling compound is sufficient because it dries in under 30 minutes and sands with minimal effort. Setting-type compounds come in powder form and are chemically cured, making them ideal for repairs that require quick completion or need to achieve a specific hardness, such as dents from furniture. If you’re working on textured walls, adding a slight texture to the filler before it dries helps it blend seamlessly. Testing a small patch first can help you decide which filler matches your wall best and reduces the risk of uneven paint coverage.
The Step-by-Step Guide to Nail Hole Repair
| Removing the Nail | You’ll start by carefully removing the nail to avoid enlarging the hole. Often, fingers are enough to pull it out gently. If it’s stubborn, use the claw of a hammer to lever it out, taking care not to chip or damage the drywall surface. |
| Filling the Hole | Two simple methods make this quick: either an all-in-one spackle tool that includes a putty knife and a sanding surface, or using your bare fingers with regular spackling compound. Both get spackled into the hole efficiently, with minimal mess. |
| Sanding Smooth | After the spackle dries, lightly sand the patched spot to blend it flush with your wall. Using the sanding feature on the all-in-one tool cap or fine-grit sandpaper gives a smooth, professional finish without damaging the surrounding paint. |
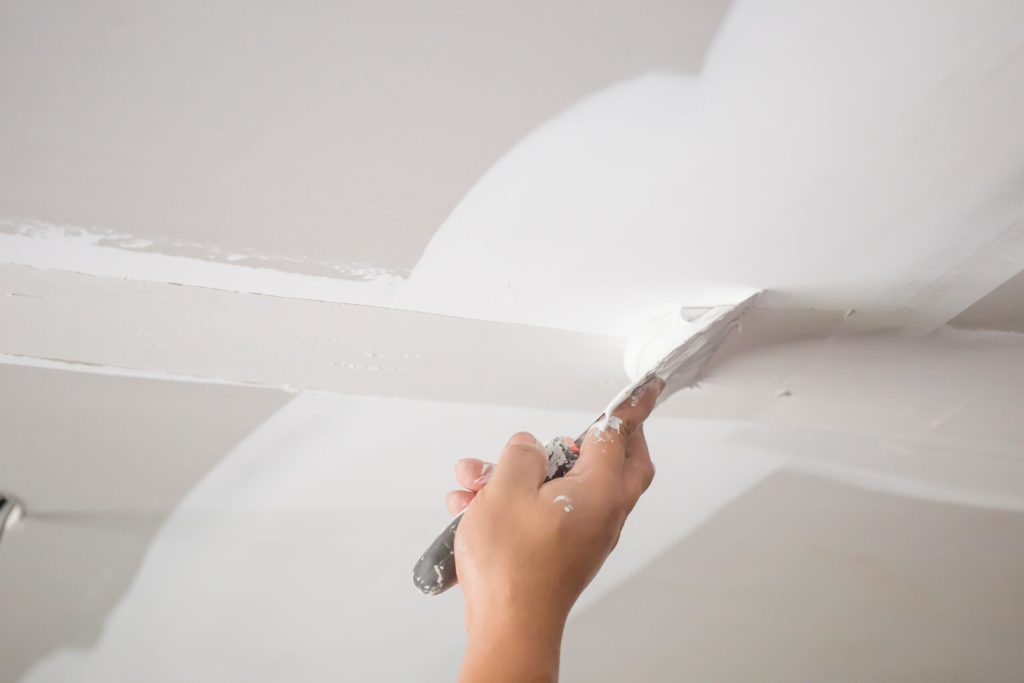
| Painting to Blend | Instead of brushing paint broadly, dab a bit of wall color onto the patch with a paper towel. Feathering out the edges helps the repair blend seamlessly with the rest of the wall, especially when using eggshell or satin finishes. |
Removing the Nail: A Quick Necessity
Pulling the nail out cleanly keeps the hole manageable and the drywall intact. You can usually wiggle it out by hand, but if it’s embedded deeply, the claw side of a hammer is your friend. Avoid twisting or forcing it too hard to prevent any additional drywall damage that would make patching more complicated.
Filling the Hole: Two Effective Methods
The all-in-one tool offers spackle, a putty knife, and sandpaper in a compact form, making it a fast and tidy fix. Squeeze a small amount into the hole and scrape off the excess for a neat finish. If you don’t have that, simply use your finger to apply regular spackle, pressing it firmly into the hole and wiping away the excess. Both methods fill the nail hole completely, eliminating the need for extra tools.
With the all-in-one tool, precision is key: use only a dab of spackle, as too much can lead to a mess and longer sanding. The built-in sanding surface quickly smooths the repair, saving time and effort. Using your finger with a standard spackle works surprisingly well for tiny holes — just focus on spreading it evenly inside the hole and removing excess to keep drying times short and the surface flat. This flexibility means you can patch multiple holes efficiently, regardless of whether you’ve invested in specialized tools.
Perfecting the Finish: Painting Tips After Repair
- Lightly feather your paint around patched areas to blend seamlessly with the surrounding wall.
- Select the right paint finish to match your existing wall for a uniform look.
- Use minimal paint to avoid obvious brush strokes or texture differences.
- Allow adequate drying time before assessing the final appearance and making any necessary touch-ups.
Lightly Feathering Your Paint for Seamless Blending
Gently dabbing paint with a paper towel or a small brush around the patch helps to soften the edges and merge the repair into the wall’s texture. Avoid heavy brush strokes or thick paint layers that stand out. This technique works best when you use just a small amount of your wall color, ideally taken from the paint can lid, so the patched area fades naturally without drawing attention.
Selecting the Right Paint Finish
Matching the finish of your existing wall paint—whether it’s matte, eggshell, satin, or semi-gloss—is key to making repaired spots invisible. For example, an eggshell finish offers a subtle sheen and effectively conceals minor imperfections, making it a popular choice for living spaces. Applying a different sheen can create an obvious patch, so using the same finish will help your repair blend perfectly.
Wall texture and light reflection play roles in how the paint finish appears. Flat and matte paints typically hide surface imperfections but show less light, while glossier finishes reflect more light and can highlight even small unevenness. You’ll want to carry a sample of your current paint sheen to the store when purchasing touch-up paint, or test a small area to ensure a good match before committing. Considering factors like room moisture—bathrooms favor semi-gloss for durability—you can choose a finish that balances aesthetics and function. Recognizing how your paint finish interacts with light and texture helps you achieve a cohesive, flawless look after patching nail holes and dents.
Transforming Flaws Into Art: Creative Wall Decor Ideas
Utilizing Wall Art to Conceal Imperfections
You can cleverly use wall art as a practical solution to hide small nail holes or dents that may be stubborn to cover completely. Choose pieces with textured frames or busy patterns that naturally draw the eye, effectively masking any minor flaws nearby. For example, woven tapestries or layered canvas prints add dimension and help distract from uneven spots, allowing you to enjoy a stylish wall without stressing over every tiny imperfection.
Gallery Wall Techniques for Adding Interest
Building a gallery wall offers both a design focal point and a functional method for masking multiple patched nail holes. Arranging varying frame sizes and artwork styles closely together camouflages imperfections by covering them and creating intentional visual rhythm. You can mix photos, prints, and three-dimensional elements, such as shadow boxes or small shelves, to amplify depth and add personality to your space.
When assembling your gallery wall, start by measuring the area and laying out the frames on the floor to find a balanced composition that suits your style. Group similar colors or themes to unify the collection, and consider staggered vertical and horizontal alignments to keep the eye moving. Using lightweight frames paired with Command Strips prevents damage while enabling easy adjustments. This technique not only conceals patched holes but also transforms your wall into an engaging and personalized gallery, turning past imperfections into a cohesive art statement.
Empowering Your DIY Skills: Confidence in Patching
Common Mistakes to Avoid
Applying too much spackle is one of the most common missteps—it creates unnecessary sanding work and can result in uneven surfaces. Another pitfall is rushing the drying process; patched areas need adequate time to set before painting, or the finish may peel or look patchy. Using a heavy paint coat instead of a light feathered touch often results in visible spots where the repair stands out. Focus on filling only the hole and blending edges smoothly to maintain a seamless look on your walls.
Building a Routine for Home Maintenance
Incorporating small repairs, such as filling nail holes, into a regular home care schedule prevents issues from piling up. Tackling these minor fixes seasonally—such as spring cleaning or fall preparation—makes the task manageable and keeps your walls fresh year-round. Having your repair supplies within easy reach encourages quick touch-ups whenever you notice wear, avoiding larger, more time-consuming repairs later.
Setting a maintenance routine transforms repair work from a daunting chore into a simple habit. By allocating just 15–30 minutes every few months to inspect and patch drywall imperfections, you keep your home’s surfaces in top shape without overwhelming effort. This proactive approach can extend the life of your paint and drywall while enhancing your enjoyment of your living space. Plus, staying on top of repairs builds your confidence, making bigger projects feel much more approachable down the line.
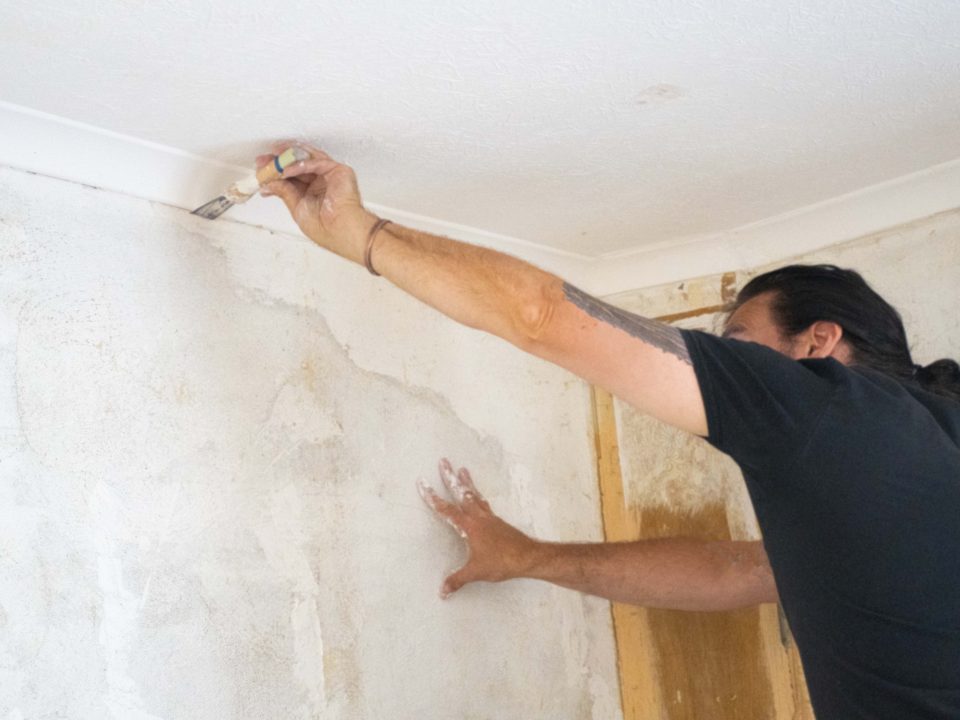
Tackling Bigger Problems: Patching Larger Drywall Holes
Assessing the Damage: When to Call a Professional
If the hole in your drywall exceeds the size of a typical nail hole or small dent—say larger than 2 inches across, or if it exposes wiring or plumbing—you might consider enlisting a professional. Extensive damage can involve structural concerns or require drywall replacement, taping, and mudding, which demands experience and specialized tools. Calling in an expert ensures a safe repair and a seamless wall finish, especially when dealing with textured walls or matching paint perfectly.
DIY Solutions for Larger Repairs
For holes roughly up to 6 inches in diameter, you can patch them yourself using a drywall repair kit, a mesh patch, or a piece of drywall cut to fit the opening. These supplies, combined with joint compound and sanding, make a sturdy fix. This approach works well for leftover wall damage from anchors, doorknob dings, or accidental wall impacts.
Start by trimming the damaged area into a neat square or rectangle with a utility knife. Cut a drywall patch to the same size and secure it inside the hole using drywall screws or adhesive mesh tape. Next, apply joint compound over the seams, smoothing it out to be flush with the wall surface. After the compound dries, sand thoroughly to blend the patch. Apply additional coats as needed for a smooth finish. Once complete, prime and paint the area to match the surrounding wall. This method not only restores the wall’s integrity but also provides a clean surface ready for repainting, all while keeping costs and time investment to a minimum.
Final Words
Drawing together everything you need to know and patching nail holes and dents before repainting is a simple step that greatly improves the finish of your walls. By using the right tools and techniques, such as spackling carefully and feathering your paint, you can ensure a smooth, professional look. Taking a little time to prepare your surfaces allows you to achieve flawless results and a longer-lasting paint finish. With these straightforward methods, you can confidently refresh your walls and enhance your home’s appearance before every paint job.
FAQ
Q: What is the most effective method for filling small nail holes before repainting walls?
A: For small nail holes, using a spackling compound is an effective and simple method. You can either use an all-in-one repair tool that combines spackle, a putty knife, and sandpaper or apply spackle directly with your finger. Fill the hole with the spackle, smooth out any excess on the wall’s surface, and once dry, gently sand the area to create a smooth finish. After sanding, apply paint in thin layers, gently feathering the edges so the repair blends seamlessly with the rest of the wall.
Q: How do I fix dents and imperfect surfaces on drywall before painting?
A: To fix dents and minor imperfections, start by cleaning the area to remove dust or loose debris. Then, apply a thin layer of spackling compound over the dent using a putty knife. Smooth it out to be level with the wall surface. Allow the spackle to dry fully—usually for a few hours—and then sand gently with fine-grit sandpaper until smooth. Once the area is even with the surrounding wall, repaint using your standard wall paint, applying thin coats and feathering out the edges for a uniform look.
Q: Can I paint directly over nail hole patches, or is additional prep needed?
A: Painting over patched nail holes requires some preparation to achieve a seamless finish after filling and sanding the holes smoothly. Lightly dab paint over the patched area instead of brushing thick coats. Using a small amount of paint on a paper towel or a sponge brush helps blend the patched spot into the surrounding wall. This gentle technique reduces noticeable texture differences and color mismatches, especially when the wall paint has an eggshell or matte finish.
—
Patching nail holes and dents is a straightforward process that can significantly enhance the appearance of your walls before repainting. Whether you’re preparing your space for a fresh coat of paint or just tidying up imperfections, following the right steps will help you achieve smooth, professional-quality results.
Gather Your Supplies
Before you begin, assemble the necessary tools:
- Spackling compound or lightweight joint compound
- Putty knife or a versatile all-in-one repair tool
- Fine-grit sandpaper (around 120-220 grit)
- Clean cloth or paper towels
- Paint that matches your wall color
Step 1: Remove Nails and Clean the Area
If any nails or screws remain in the wall, remove them gently. Wipe away any dust or debris from the holes or dents to ensure proper adhesion of the spackle.
Step 2: Apply Spackling Compound
Fill the nail holes or dents with a small amount of spackling compound. Using the putty knife or your finger, press the spackle firmly into the hole, then smooth it out so the surface is flush with the surrounding wall. Avoid applying too much at once—it’s easier to add more if needed after it dries.
Step 3: Let It Dry Thoroughly
Allow the spackle to dry completely according to the product instructions. Drying times can vary but typically range from 20 minutes to a couple of hours for small patches.
Step 4: Sand Smooth
Once dry, lightly sand the patched area to remove any ridges or unevenness. Use fine-grit sandpaper and sand in a circular motion to blend the patch seamlessly with the wall surface.
Step 5: Paint the Patched Area
To cover your repairs, dab a small amount of matching paint over the patched spots with a paper towel, a makeup sponge, or a small artist’s brush. This dabbing motion helps feather the paint, allowing the patch to blend in subtly. Apply additional thin coats as needed, allowing each one to dry completely.
Final Tips
Take your time with drying and sanding for the best finish. Light coats of paint will blend better than heavy, thick layers. By following these steps, your walls will look flawless and ready for a fresh, even paint job.
For professional painting services and expert advice on wall prep and finishing, visit Frederick Painting.

Shawn Zimmerman started painting in the summer of 1991, the year before he graduated high school. Shawn decided to pursue his career in the family business and continued to develop his skills in the trade while also developing the necessary skills to manage the business. Shawn enjoys being outdoors, canoeing, camping, hiking, hunting, fishing and spending time with family.
