
Inspiring Commercial Office Interior Paint Color Ideas
May 2, 2024
Ready for a Refresh? How to Prepare Your House for Painting
May 21, 2024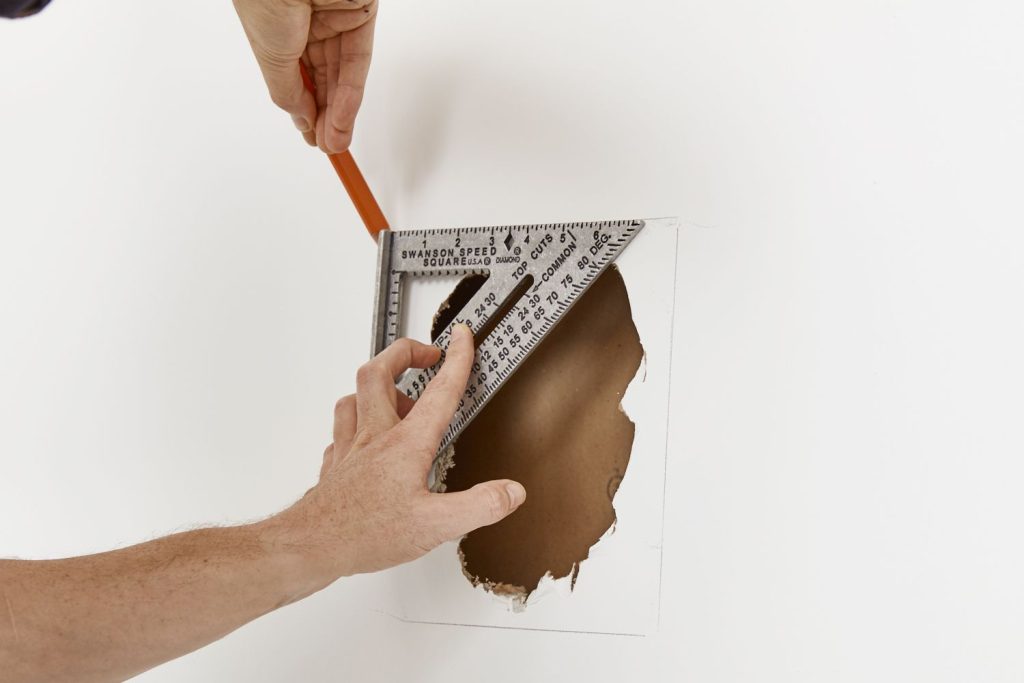
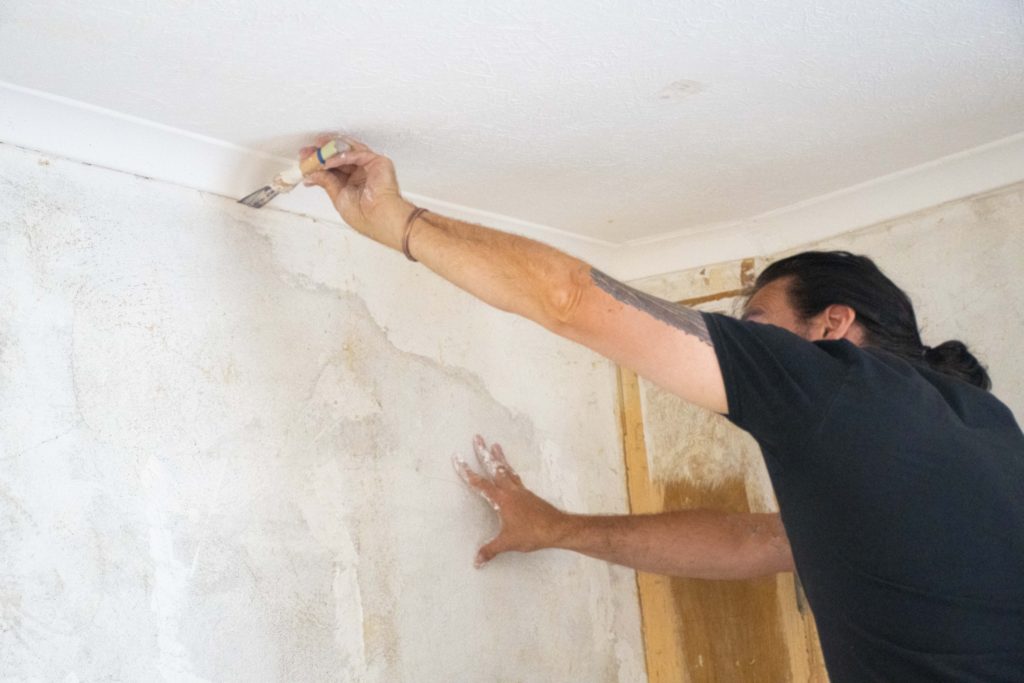
Transforming your home begins with details as small yet crucial as fixing drywall before welcoming a fresh coat of paint. Even with pristine color choices and the best professional painters, uneven surfaces can detract from the overall aesthetic you aim to achieve. Whether it’s a tiny puncture from moving furniture or a more extensive section needing attention due to water damage, mastering drywall repair bolsters the integrity of your walls and sets a faultless canvas.
I’ve worked on everything from the tiniest nicks in San Francisco apartments to substantial repairs in bustling commercial buildings.
In this article, you’ll find essential insight into remedying various drywall mishaps and preparing them perfectly for that transformative layer of paint.
Identifying types of drywall damage before repair
Before diving paintbrush first into refreshing your home’s aesthetics with a fresh coat of paint, it’s essential to give your walls the once over, paying close attention to the condition of the drywall.
It’s the canvas for your paint, after all.
Differentiating minor dents and small holes from more significant damage is the first step in ensuring a flawless finish.
While pinpoint wear could be from the accidental bump or the misadventure of moving furniture, more significant stress areas may signal underlying structural concerns.
Keeping an eye out for cracks is also a must, as they often indicate possible water damage or a house settling into its foundations.
Then there’s the tiny but telling evidence left by nails or screws signs that speak of wall hangings of the past but require careful attention before a smooth, fresh layer of primer and paint can adorn your living space.
Accurately assessing these imperfections will determine the amount of preparation required to achieve the polished look you envision for your home.
Differentiating small holes from more extensive damage
Upon closer examination of your walls, distinguishing between the smaller perforations and more severe drywall damage becomes a pivotal step. Small holes, typically no more substantial than the size of a coin, can often be gently filled and sanded with ease, restoring the surface to a paint-ready state. In contrast, more giant fissures or gaping cavities in the wall demand more robust repair techniques. They may require you to seek a professional to address potential underlying issues before proceeding.
Spotting cracks and water damage
In my hands-on experience with interior home renovations, I’ve learned that cracks can be subtle traitors that reveal more than just aesthetic flaws; they are often harbingers of moisture intrusion. Acknowledging this, I carefully assess for signs of water damage adjacent to cracks, as discoloration or a softening of the drywall might indicate a deeper issue that must be rectified to preserve the integrity of the home’s structure before proceeding with priming and painting.
Assessing damage from nails or screws
Before the primer can kiss the wall, it’s imperative to address the tiny—but telling—scars left by nails and screws. As a seasoned house painter and decorator, I often encounter these small punctures that every once defiant picture and mirror has left behind. Repairing these minute breaches is more than a cosmetic touch-up; done correctly, it creates a seamless surface, preventing future paint from flaking at these vulnerable points and ensuring lasting customer satisfaction.
Gathering tools and materials for drywall repair
As we turn our attention to mending the scars and storylines our home’s walls hold before a transformative coat of paint, assembling the right toolkit is crucial.
The delicate art of drywall repair is more than mere spackling—it’s a symphony of tools and materials that restore surfaces to their former glory.
It’s time to discuss the essentials, from choosing which drywall compound will serve your project best to debating whether fiberglass’s resilience or paper drywall tape’s smooth finish is better.
Each decision plays a critical role in prepping your walls for the stunning layers of color and texture they’re poised to receive.
Essential tools to have on hand
The journey to a rejuvenated wall begins with the assembly of essential tools. Before embarking on this project, I ensure I have a putty knife, sanding block, and joint compound ready. These are the stalwarts in the realm of drywall repair. A utility knife and a measuring tape form the backbone of my repair arsenal, crucial for precise cuts and seamless patches.
- putty knife for applying and smoothing compound
- sanding block to even out patchwork
- joint compound to fill holes and cracks
- utility knife for trimming damaged drywall
- measuring tape for accurate repairs
Choosing the correct type of drywall compound
Embarking on the crucial stage of selecting the ideal drywall compound, I consider the project’s specific needs. For simple repairs, I lean towards a lightweight, all-purpose compound that’s easy to sand and perfect for a quick touch-up. However, for those deeper repairs where shrinkage is a concern, a setting-type compound offers durability and less shrinkage, ensuring I can confidently move on to priming and painting without the apprehension of rework.
Selecting drywall tape: paper or fiberglass?
In drywall repair, selecting the correct tape is tantamount to ensuring a smooth finish. Paper tape is my go-to for its ability to create crisp, clean lines, especially in the corners of a room, but it does require a deft hand and precise application. Conversely, when I anticipate movement or the need for extra strength, fiberglass mesh tape, with its self-adhesive backing and resistance to cracking, becomes an invaluable asset, especially on flat surfaces where perfection is paramount.
Step-by-step guide to patching small drywall holes
Embarking on a journey to revitalize your home’s interior with a fresh layer of paint starts with proper drywall preparation—every painter and decorator knows that the secret to a flawless finish lies beneath.
Patching small drywall holes is an essential skill. It is simple yet vital to the overall look of your painted room.
Before grabbing that brush, let’s zero in on the initial steps: cleaning the area around the hole to ensure a dirt-free surface for better adhesion, mastering the application and sanding of the drywall compound for an invisible repair, and applying a prime coat to set the stage for the painting.
Each building block paves the way for a professional caliber result to enhance the room’s aesthetics and speak volumes about the care and detail invested in your home’s transformation.
Cleaning the area around the hole
First things first, a clean workspace is foundational to successful drywall repair, so I begin by tidying the area around the hole. With a sponge or damp cloth, I gently remove any dust, debris, or spider webs to ensure the drywall compound adheres solidly, setting the scene for a repair that is as lasting as it is invisible.
Applying and sanding drywall compound
Once the hole is clean and prepped, it’s time to wield the putty knife with a steady hand. I apply a dollop of drywall compound, ensuring it fills the void and lies flush with the wall. After allowing it to dry thoroughly, a critical phase, I affectionately tend to the area with a sanding block, employing a feathering technique to blend the repair seamlessly with the surrounding texture. This revives the wall to its smooth state and eliminates any telltale signs of the repair beneath my final paint job.
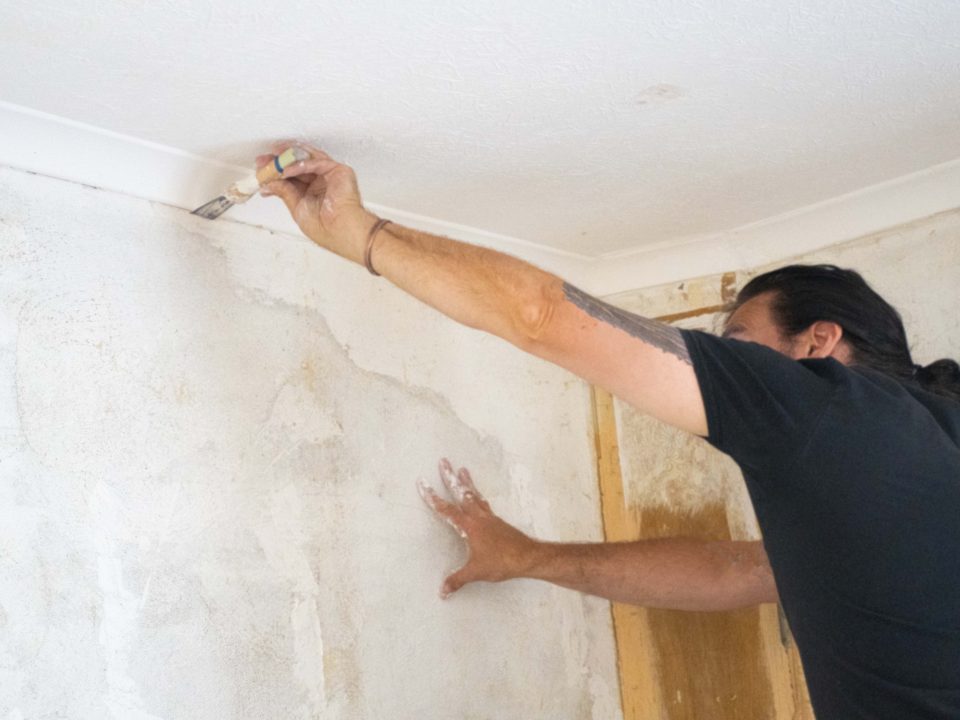
Priming the patch before painting
Priming the patch is like setting the stage for your paint: it ensures that your color will adhere better and present its true tone on the wall. Applying primer removes any small imperfections in the compound, preventing the paint from soaking in unevenly. A rigorously primed surface leads to a uniform paint application, integral for the refined look I aim to deliver in every stroke.
| Step | Task | Details |
|---|---|---|
| 1 | clean the area | ensure the surface around the hole is free from dust and debris for optimal adhesion. |
| 2 | apply the compound | fill the hole with drywall compound, carefully making the surface flush with the wall. |
| 3 | let it dry | wait for the compound to dry thoroughly before sanding to prevent indentations or rough spots. |
| 4 | sand the area | smooth the patched surface with a sanding block, blending it seamlessly into the existing wall texture. |
| 5 | prime the patch | apply primer to the patched area to ensure even paint application and accurate color presentation. |
Techniques for repairing larger drywall areas
Transitioning from the hobbyist task of fixing minor imperfections to tackling the challenge of more considerable drywall damage requires a strategic approach.
As a professional painter and decorator, I recognize that true expertise shines when replacing and restoring sections of drywall that have suffered more than just a dent or a ding.
In the following steps, I’ll use my experience to guide homeowners through cutting out damaged sections, accurately fitting and securing a drywall patch, and taping edges to ensure a stronghold.
The culmination of this effort will be skilfully applying joint compound and using precise sanding techniques to achieve a smooth finish that it seems the wall was never marred in the first place.
Cutting out damaged sections
Tackling the challenge of larger drywall repair begins with an unwavering focus as I remove the compromised material. I carefully score around the damaged area with a sharp utility knife, a practiced motion that lets me cleanly extract the defective sections without impacting the surrounding wall integrity. Thus, I am setting the groundwork for a robust drywall patch that melts seamlessly with the existing structure.
Installing a drywall patch and taping the edges
After carefully cutting out the damaged section, my next move is to properly align and secure the new drywall patch. This critical phase anchors the repair, prepping it for the crucial step of taping. With precision, I apply either paper or fiberglass tape along the edges, ensuring every seam is covered to create a stronghold that blends indistinguishably once the joint compound is applied and finely sanded.
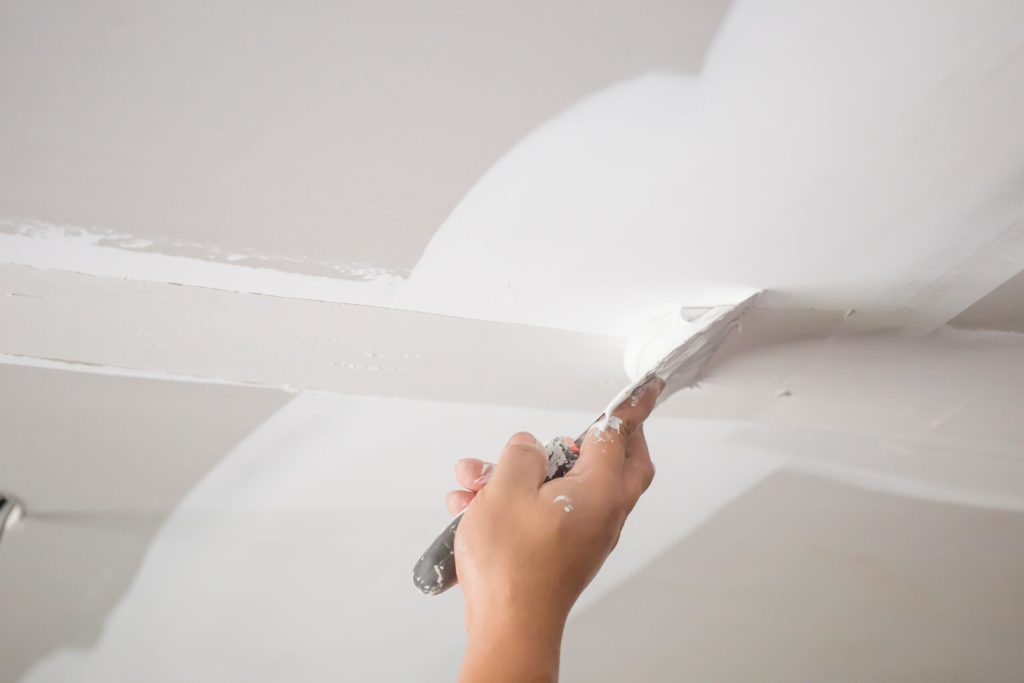
Applying compound and sanding for a smooth finish
Applying the joint compound requires patience and precision for the final leg of our repair journey. Once the patch is in place, I work the compound over and into the seams with finesse, feathering the edges to ensure no lines or ridges will mar the smoothness of your walls. After drying, I carefully sand the patch in a circular motion, transforming the once-blemished section into a perfectly smooth canvas ready to capture the colors you have envisioned for your home’s interior.
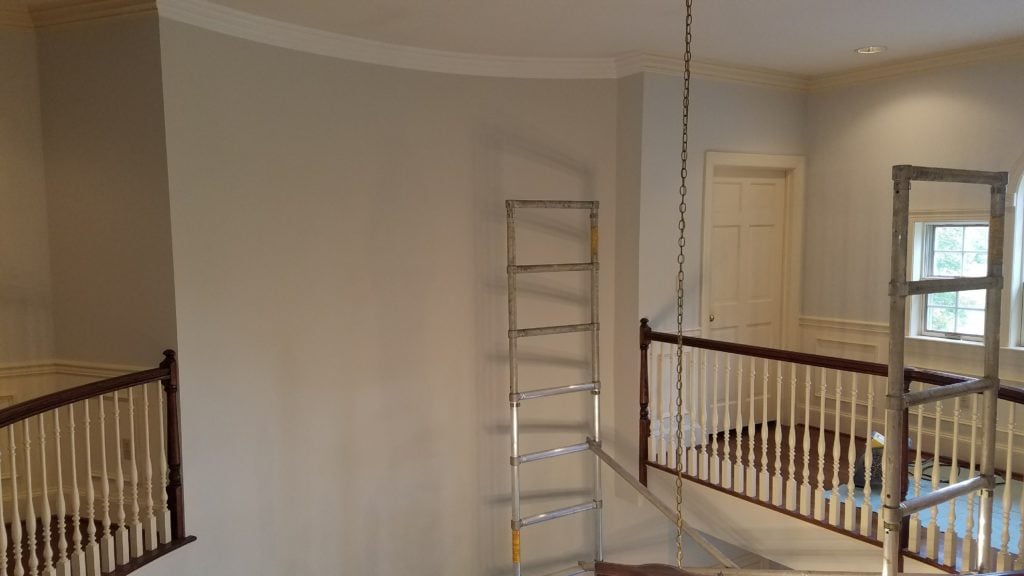
Tips for seamless painting over repaired drywall
The journey through drywall repair only lays the groundwork for the transformative power of paint.
With surfaces smooth and imperfections skillfully concealed, the focus turns to the nuances of painting.
The right primer is my nonnegotiable for seamlessly integrating old and new surfaces. It offers a uniform base that will display your chosen hue in its truest form.
Selecting the perfect paint type and color becomes an enchanting chapter in your home’s rejuvenation.
As a dedicated painting professional, I share the techniques that bridge repaired areas with existing walls. This blend of art and science culminates in a harmonious finish as if the walls had never borne a mark.
This passage to the final reveal is where my expertise truly shines, guiding your home’s palette to a flawless presentation.
The importance of primer for a uniform finish
Embracing the transformative potential of a fresh coat of paint begins with the pivotal role of primer. A consistent, smooth application sets the groundwork for a unified paint surface, disguising the transitions between old and new textures. It’s the hero behind the scenes, ensuring that every inch of the wall interacts with light and color in the same way, providing the ideal backdrop for your color choices to shine truly.
| Step | Action | Outcome |
|---|---|---|
| 1 | clean and prep | ensure a smooth surface free of dust and debris. |
| 2 | apply primer | create a uniform base to conceal patches and help paint adhere. |
| 3 | paint application | achieve a flawless, even finish across all repaired areas. |
Choosing the right paint type and color
After laying the groundwork with precise drywall repair and applying quality primer, the final piece of the home transformation puzzle is the paint itself. Deliberating over the ideal paint involves considering not only the color that will complement the room but also the paint type suited to the demands of each space: a scrubbable, glossy finish for high-traffic areas, a matte elegance for ceilings, or perhaps a mold-resistant blend for bathrooms. Your choice will tie the aesthetic elements together and offer enduring protection and ease of maintenance for the walls you’ve invested time and effort into preparing.
- Identify the room’s function and choose a paint type that matches its needs.
- Select a color that harmonizes with the room’s lighting and existing décor.
- Consider the longevity and practical benefits of different paint finishes.
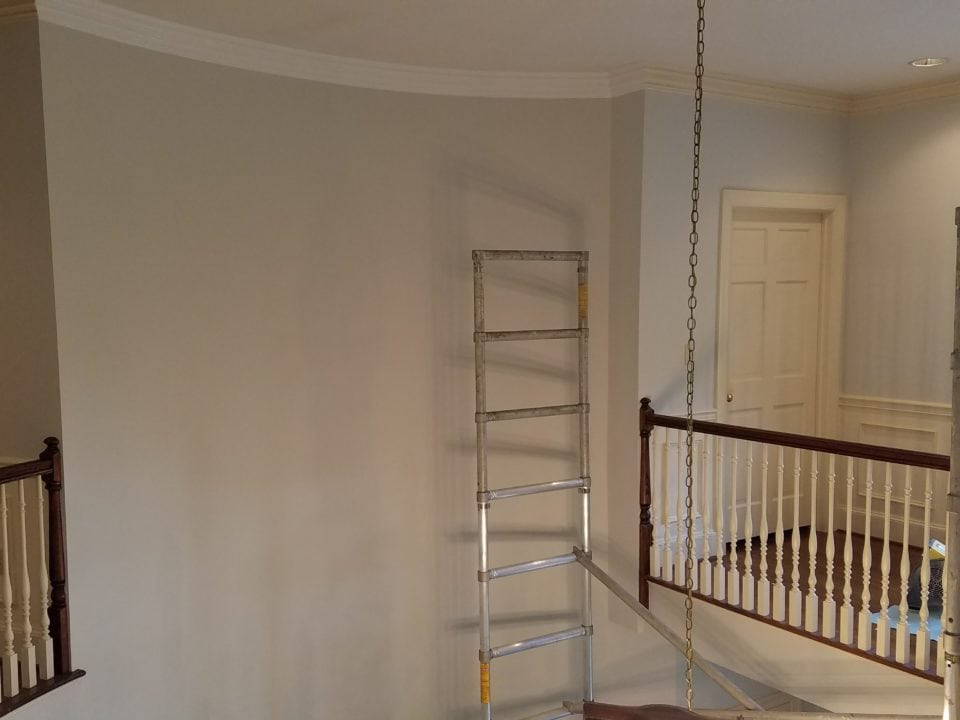
Techniques for blending repaired areas with existing walls
Blending repaired areas with existing walls demands a technique rich in finesse and attention to detail: it’s an art form I take pride in. After the primer sets the stage for uniformity, I use a nuanced approach in applying the paint, feathering out the edges where the new meets the old. This careful blending ensures that the repair merges invisibly with the rest of the wall, creating a continuous, smooth surface that looks like it was always meant to be.
| Phase | Technique | Goal |
|---|---|---|
| initial paint application | feathering edges | to merge new paint with the existing surface seamlessly. |
Common Drywall Repair Mistakes and How to Avoid Them
Turning our attention to the finer nuances of preparing walls for a transformative paint job, I can’t overemphasize the importance of evading the common pitfalls that await in drywall repair.
Patience is paramount; rushing through the stages can leave you with subpar results.
I’ve seen many skip crucial steps, and it’s a recipe for disappointment.
Allowing each layer, from compound to primer, to fully dry is essential to avoid compromising the wall’s integrity.
Likewise, sanding should always be valued; it’s the cornerstone of achieving a texture indistinguishable from the original surface.
When it comes to applying that final coat, consistency in paint finishes and precision in matching colors are non-negotiable.
These steps are not mere formalities; they form a vital framework that ensures the longevity and beauty of your home’s interior paintwork.
Not allowing adequate drying time between steps.
In my experience, one critical error often overlooked during drywall repair is the temptation to rush the drying process between each key step. I have learned that giving your joint compound, primer, and paint sufficient time to dry is not a mere suggestion—it’s imperative. Hastening these steps can lead to shoddy results, where paint peels or drywall tape lifts, compromising the smooth, professional finish you and your walls deserve.
Skimping on sanding and ending up with rough textures
Refining the art of sanding is essential to prevent rough textures that betray a repair job. A hasty sanding job can leave shadows beneath the paint, creating a surface that feels out of place against its surroundings—a telltale sign of an amateur repair in an otherwise harmonious wall. Moreover, skimping on this step can result in noticeable irregularities that catch both the light and the critical eye of discerning guests.
- Carefully sand the repaired area to smoothness.
- Avoid hurried sanding that results in uneven surfaces.
- Seek uniformity to ensure the repair blends invisibly with the existing wall.
Mismatching paint finishes or colors
A nuance often overlooked even by diligent homeowners is ensuring continuity in paint finishes or color matches post-drywall repair. I perform this delicate dance with each project, evaluating the shade and sheen, ensuring that newly painted areas do not inadvertently highlight repaired sections. Devoting close attention here secures an indistinguishable blend throughout the room, evidencing a standard that aligns with professional craftsmanship.
Proper drywall repair is foundational to achieving a flawless paint finish in your home. It ensures that walls are clean and smooth and ready for priming and painting.
Patching even small imperfections and waiting for adequate drying time between steps are key actions that guarantee a professional-quality outcome.
Utilizing the right tools, materials, and techniques for drywall repair allows for seamless integration with existing wall textures and optimizes paint adhesion and appearance.
Proper preparation and attention to detail in drywall repair can transform your living spaces and reflect the care you invest in your home’s presentation.
Successfully repairing drywall is key to achieving a smooth, professional paint finish. By addressing damage properly, you set the foundation for a beautiful interior. Trust Frederick Painting for expert tips and techniques to perfect your home’s look.

Shawn Zimmerman started painting in the summer of 1991, the year before he graduated high school. Shawn decided to pursue his career in the family business and continued to develop his skills in the trade while also developing the necessary skills to manage the business. Shawn enjoys being outdoors, canoeing, camping, hiking, hunting, fishing and spending time with family.
