
How to Do Simple Drywall Repair Before Painting the Interior of Your Home
May 14, 2024
How Do I Find a Qualified Painting Professional?
May 30, 2024
A fresh coat of paint breathes new life into any room, transforming a drab space into a personal haven with just a brush stroke.
Embarking on a home painting endeavor, whether for the sunlit living room or the secluded basement, is a journey filled with choices – from selecting a compelling color palette to finding the ideal tools that promise finesse in every dab.
The key to a seamless makeover lies in the groundwork; proper preparation sets the stage for a splendid painting that endures the tests of time and living. As you embark on this journey, remember that each step you take is a testament to your capability and determination to transform your living space.
This article will guide you through the essential steps to prepare your home for a painting transformation that stands the test of time and echoes your unique style. Your personal touch makes your home truly yours, and we’re here to help you bring it to life.
Choosing the Right Paint and Tools for Your Home Makeover
Embarking on a home painting project stirs a mix of excitement and trepidation.
Preparing to refresh and revitalize my living space, I must lay the groundwork for a successful transformation.
Key to this preparation is the pivotal decision between water-based and oil-based paints – a choice that affects everything from drying time to durability.
Assembling the tools needed to turn vision into reality is also crucial. But before we dive into the exciting world of painting tools, let’s not forget about safety. Always wear protective gear such as gloves and goggles when handling paints and chemicals. This will ensure your safety and the longevity of your painting project.
Brushes, rollers, and drop cloths are not just implements but allies in the mission to breathe new life into the walls surrounding me.
Deciding Between Water-Based and Oil-Based Paints
Pinpointing the ideal paint for my home’s walls involves careful consideration of the unique qualities that water-based and oil-based variants offer: water-based for its swift dry times and eco-friendliness, oil-based for its resilience and sheen. It’s not merely a choice; it’s a commitment to the atmosphere and utility of each room I plan to animate.
| Water-Based Paints | Oil-Based Paints |
|---|---|
| Eco-friendly with low VOCs | Durable with a lustrous finish |
| Quick drying and easy clean-up | Longer drying time, but rich coloring |
| Best for living spaces and bedrooms | It is ideal for trim and areas needing a harsh coat |
Essential Tools Every Painter Needs
Equipping myself with the right brushes – angled for precision around corners and flat for smooth surfaces – is as essential as selecting premium paint. Joining them, a dependable roller extends my reach and imbues texture, while the unassuming yet vital painter’s tape promises sharp lines and protects my skirting boards. Without these fundamental tools, even the most vivid paint can’t fulfill its potential on my home’s canvas. Additionally, consider investing in a paint tray, a ladder, and a paint can opener for a more efficient and comfortable painting experience.
Planning Your Painting Project From Start to Finish
Transitioning to the nuts and bolts of my house painting endeavor, setting a realistic timeline, and adhering to a budget are cornerstones of project management that must be considered. A realistic timeline ensures you have enough time to complete each project phase without rushing, while a budget helps you allocate your resources wisely and prevent overspending.
My aim is to craft a schedule that allows for thorough prep, painting, and drying without disregarding life’s other commitments.
Concurrently, my focus turns to the financial side, and I am strategizing on achieving that fresh look without upsetting my fiscal harmony.
Both timeline and budgeting are integral gears in a painting project’s mechanism, ensuring the journey from tired walls to reinvigorated spaces is as smooth as the final coat we seek to lay down. Rest assured, with careful planning and our guidance, you can confidently manage both aspects without compromising on the quality of your project.
Setting a Realistic Timeline for Your Painting Job
Embarking on the path of refreshing my home with a new coat of paint, I recognize the wisdom in setting a timeline that accommodates each critical phase – from prepping surfaces to applying the finishing touches. I allocate time judiciously, factoring in the room’s size, the intricacies of cutting around molding and fixtures, and the vagaries of weather, which can influence drying times, especially for exterior work. The goal is to prevent a haphazard rush and to allow the painted transformation to unfold with the precision of a well-practiced symphony.
Budgeting Tips for a Cost-Effective Paint Revamp
As I sift through quotes from local house painters, I remain aware that an affordable painting project does not require cutting corners on quality: It’s about informed choices and strategic planning. Investing time in comparing estimates and parsing out the breakdown of costs—covering paint, supplies, and labor—enables me to recognize where the value lies. This careful cost assessment dovetails with my resolve to never compromise on the aspects that ensure the longevity of my home’s new coat.
- Analyze multiple estimates to find a balance between cost and quality
- Decipher detail-oriented cost breakdowns for transparency
- Emphasize the value of investment in quality for lasting results
Prepping Your Space for a Hassle-Free Painting Experience
With the decision to refresh my living area firmly in place, I turn my attention to arguably the most critical stage before the first stroke of color graces the walls: preparation.
Indeed, creating a pristine and ready canvas involves more than selecting the perfect shade; it’s about ensuring every inch of the space is primed for transformation.
Before embarking on the tactile steps of Clearing the Room – discerning which items will remain as silent observers and which will vacate the premises – I must strategize the best methods for safeguarding my cherished possessions.
Protecting Furniture and Flooring From Paint Splatters isn’t just a preventative step; it’s the foundation for a seamless painting journey, where the focus remains steadfastly on the art of renewal, not the cleanup fiasco.
Clearing the Room – What Stays and What Goes?
As I embark on decluttering the room for painting, I’m faced with decisions that require a delicate balance between practicality and preservation. My focus becomes determining which furniture pieces can remain as long as they’re shrouded in protective coverings and which need to be temporarily rehomed to avoid the flurry of painting activity. This calculated approach allows me to safeguard items against accidental spills while maintaining sufficient space to navigate and ensure every corner receives the painter’s touch.
Protecting Furniture and Flooring From Paint Splatters
Amid the whirl of brushes and rollers, the importance of protecting my furniture and flooring from paint splatters escalates. It’s about creating barriers with drop cloths and plastic sheeting, those unsung guardians that stand between my cherished hardwood floors and any stray droplets of color. Start by covering the floor with a drop cloth, ensuring it’s fully spread out and secured at the edges. Then, cover your furniture with plastic sheeting, taping it securely to prevent any paint from seeping through. Their deployment is routine and a critical strategy to ensure cleanliness and preservation under the veil of renovation.
- Gather protective materials like drop cloths and plastic sheeting.
- Cover furniture and flooring meticulously to guard against spills.
- Secure the edges to prevent slippage and leaks during the painting process.
The Importance of Cleaning Walls Before You Start Painting
As I stand on the brink of transformation for my home, I acknowledge that pristine results hinge on preparations.
Clearing away the vestiges of everyday life from my walls isn’t just a chore; it’s a crucial first step toward ensuring the paint adheres and offers a flawless finish.
Grappling with DIY techniques to banish every speck of dust, grimace-inducing grime, and insidious grease becomes my quest.
Armed with that knowledge, I must match the right cleaning solutions to the diverse wall types sheltering my daily existence.
Everything must be set for the upcoming renewal, a tableau of clean surfaces beckoning the brush and the roller.
DIY Techniques for Removing Dust, Grime, and Grease
Embarking on the path of pre-painting wall preparation, I’ve discovered that simple household items can be powerfully effective. A mixture of water and mild detergent, applied with a soft sponge or cloth, works wonders to dissolve the thin film of dust and everyday buildup that walls quietly collect. For stricter grime or grease, especially in high-traffic areas like the kitchen, adding a bit of baking soda to the mix creates a gentle abrasive scrum that lifts stubborn stains without harming the underlying surface:
| Cleaning Solution | Primary Use | Benefits |
|---|---|---|
| Water and mild detergent | General dust and light grime removal | Non-toxic and safe for most painted surfaces |
| Baking soda addition | Heavy grime and grease spots | Gentle abrasive quality without damaging walls |
Choosing the Right Cleaning Solutions for Various Wall Types
As I navigate the pre-painting phase, choosing the right cleaning solution becomes paramount to protecting the integrity of various wall types. I veer towards a gentle, non-abrasive soap for my delicate plaster walls, avoiding the peril of soaking the material. At the same time, my sturdier stucco surfaces can withstand a more vigorous scrub with a trisodium phosphate substitute. I commit to cater to each wall’s needs, ensuring they are pristine and ready for the new coat of paint that will redefine my space.
Mastering the Art of Taping Edges and Corners Like a Pro
Approaching the task of wall preparation, my eyes firmly fixed on the areas where walls and woodwork meet—the edges and corners.
Precision here is non-negotiable, starting with arming myself with the suitable tape.
The goal is to select painter’s tape that staunchly defends against the encroachment of bleeding paint to deliver the sharp, clean lines that distinguish a professional-quality job from a mediocre attempt.
It’s about ensuring sharp, crisp lines that testify to my meticulous approach.
Selecting Quality Painter’s Tape to Avoid Bleeding
Regarding taping edges and corners, I’ve learned that not all painter’s tape is equal. Selecting a tape that promises clean removal and sharp paint lines is vital to circumvent the frustration of bleeding paint. I look for tapes specifically designed to seal edges tightly against various textures, ensuring crisp transitions that elevate the aesthetics of my space.
- Research tapes with strong adhesion appropriate for the texture of my walls.
- Choose a tape that offers clean, residue-free removal to maintain pristine surfaces.
- Opt for a width that suits the trim or area to ensure complete coverage and proper protection during painting.
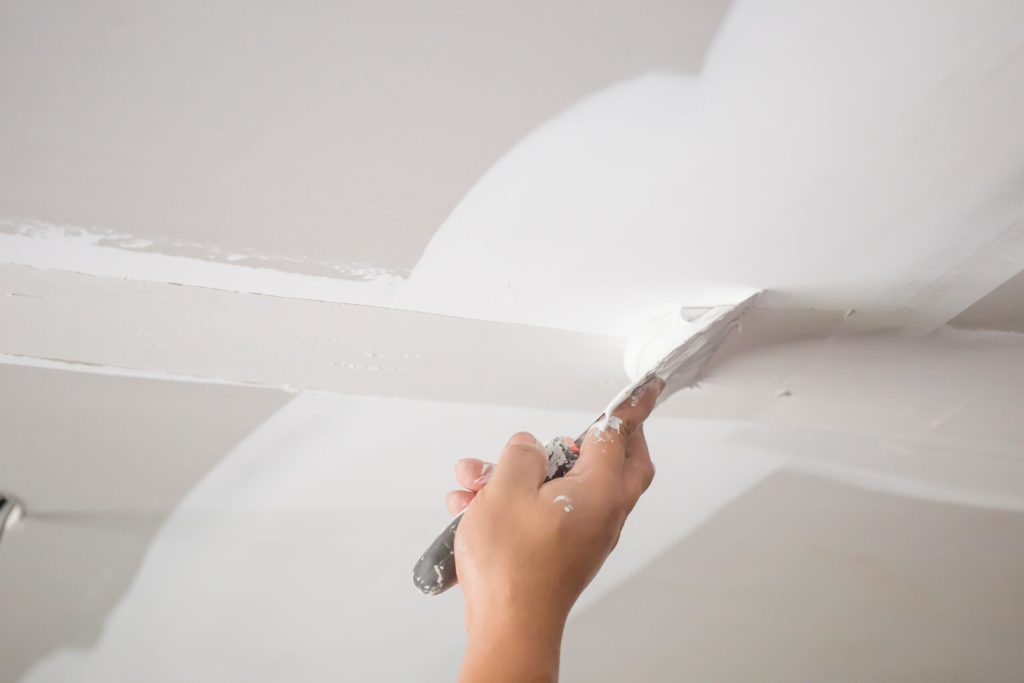
Smooth Sailing: Filling Holes, Cracks, And Dents in Walls
Stepping into the preparatory phase of revitalizing my home with fresh paint, I confront the walls up close, scrutinizing every imperfection. Addressing holes, cracks, and dents is an indispensable step toward achieving wall surfaces as smooth as a canvas awaiting an artist’s first stroke. Gingerly, I fill these blemishes with spackle, fine-tuning the texture to ensure these past flaws become imperceptible once the paint is applied.
The satisfaction of restoring a flawed wall to its original glory is one of the highlights of pre-paint preparation for me. Using a putty knife with precision, I ensure the filler is applied evenly and sanded smoothly, creating a seamless surface. This attention to detail sets the foundation for a paint job that transforms and transcends.
As I prepare my walls for transformation, I appreciate the craftsmanship involved in these preparatory tasks. Filing away the signs of wear and tear, I can’t help but think of it as curating my space’s history, sculpting a foundation on which the new chapter of my home’s aesthetic journey will be written.
Preparing your house for painting is crucial to ensuring a flawless finish that breathes new life into your space.
By diligently selecting eco-friendly or durable paints and arming yourself with the proper tools and techniques, you can master the details that lead to a professional-quality job.
Protecting and cleaning surfaces before the first stroke of a brush ensures the paint adheres beautifully and your space remains tidy throughout the process.
Investing the time to meticulously plan and prepare will result in a transformed home that showcases your commitment to aesthetics and craftsmanship.
Proper preparation is essential for a successful painting project. Frederick Painting & Supply, Inc. offers expert advice on preparing your home for a fresh coat of paint. By following this guide, you can ensure a smooth, long-lasting finish that revitalizes your space. Trust our expertise to achieve professional results and enhance your home’s appeal.

Shawn Zimmerman started painting in the summer of 1991, the year before he graduated high school. Shawn decided to pursue his career in the family business and continued to develop his skills in the trade while also developing the necessary skills to manage the business. Shawn enjoys being outdoors, canoeing, camping, hiking, hunting, fishing and spending time with family.


