Should I Paint My Ceilings the Same Color as the Wall?
November 10, 2021
Your Guide to Top ‘Local House Painters Near Me
December 24, 2023
Have you ever looked around your house and felt a sense of déjà vu? Not because you’ve been there before (obviously), but because the colors on the walls have started to fade into monotony?
Painting your home interior, it turns out, can be an epic journey. It’s not just about slapping color onto walls. It’s an exploration, like diving deep into crystal-clear waters or climbing majestic mountains.
This is no ordinary DIY project—it’s a transformation that brings rooms back to life with each stroke of a paintbrush. From choosing the best paint for your home interior, learning essential painting techniques for professional results, all the way through maintaining those freshly painted surfaces… we’ve got you covered!
Imagine the thrill of anticipation as new shades replace old ones and experience firsthand how light dances differently in your space. We promise these experiences and more.
Table of Contents:
- Understanding the Painting Process
- Selecting Paint and Primer
- Essential Tools for Home Interior Painting
- Painting Techniques for Professional Results
- Hiring Professionals vs. DIY
- Maintaining Your Painted Interior
- Budgeting for Your Home Interior Painting Project
- FAQs in Relation to Painting Your Home Interior
- Conclusion
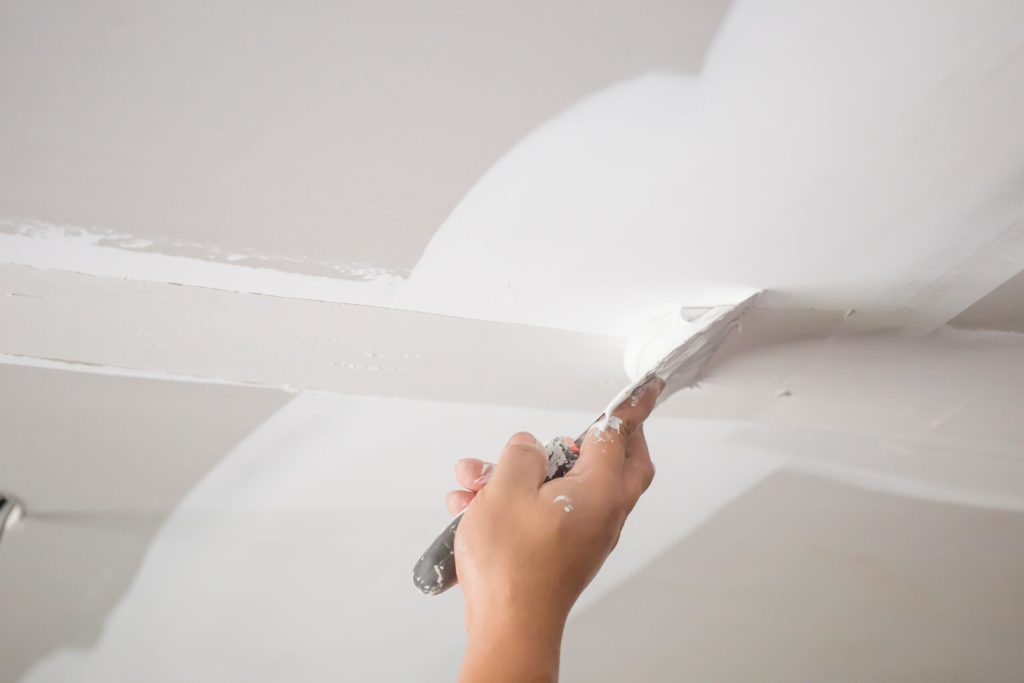
Understanding the Painting Process
The process of painting your home interior involves more than just slapping some color on a wall. Let’s delve into the nitty-gritty, breaking down each step to help you get professional results.
Preparing Your Space
First things first: prepare your space for painting. This means cleaning walls and removing any obstacles that could hinder smooth application or risk paint splatter. Use warm soapy water and a sponge to scrub off dirt, grime, or cobwebs from your walls before letting them dry completely.
Moving furniture away from the area being painted can also save you stress in case of accidental spills. If it’s too heavy to move entirely out of the room, try covering it with plastic sheets or old bed linens for protection against stray drips.
The Order of Painting
There’s a recommended order when starting an interior house painting project. Starting with ceilings is smart because gravity might lead to paint drops falling onto freshly painted surfaces if left till last.
You then want to shift focus towards your walls – these make up most visual space within rooms and are therefore crucial in setting the ambiance tone. Baseboards often catch excess paint droplets during ceiling and wall jobs but since they’re typically last on our list – no worries.
Precision matters when doing edges around windows and doors as well as other detailed areas; this technique, known as ‘cutting-in,’ gives crisp lines where colors meet.
Here’s a handy guide explaining how best to do this intricate task yourself.
| Cleaning Walls Before Painting: | Warm soapy water and a sponge |
|---|---|
| Order of Painting: | Ceiling, Walls, Baseboards |
| ‘Cutting-In’ Technique: | Precision painting for edges around windows & doors |
Not only is this process a means to an end, but it also requires expertise.
Key Takeaway:
Tackle the walls and finally focus on the baseboards. Don’t forget to employ the ‘cutting-in’ technique for neat lines around windows. It’s not just about color selection—painting your home interior is a detailed process demanding careful preparation and systematic execution.
Selecting Paint and Primer
Choosing the right paint and primer for your home interior project can be daunting. Don’t fret; we’ve got your back.
The Importance of Mixing Paint
Mixing paint is not just an artistic whim; getting uniform color on your walls is crucial. Even if the store mixed it a few hours before, giving it another stir will ensure consistency.
Different types of interior paints have unique properties that make them suitable for different areas in your house. From satin finishes perfect for high-traffic areas to flat paints ideal for ceilings – there are options galore.
In terms of colors, light shades can help make small rooms appear larger, while darker hues add depth and drama to large spaces. Don’t be scared to experiment with tints until you discover something that speaks to you.
To Prime or Not To Prime?
Priming is often considered an optional step when repainting a wall with the same color and good existing paint quality – but sometimes it’s worth going that extra mile. Using drywall primer on bare drywall paper ensures better adhesion of colored coats.
A neat trick? Pre-tint your primer so it matches your intended wall color. This reduces the number of colored paint coats needed, saving both time and money. Now who doesn’t love efficiency?
Remember: While choosing between various brands offering seemingly identical products might seem overwhelming at first glance – take heart knowing each decision brings us closer to creating our dream homes.
Lastly, don’t forget about using brushes vs rollers. The brush offers precision for those tricky corners, while the roller covers large areas quickly. The perfect combo? We think so.
Key Takeaway:
Choosing the right paint and primer for your home’s interior isn’t as daunting as it seems. Remember to mix your paint for color uniformity, select types suitable for different areas of your house, and experiment with colors until you find what suits you best. Don’t overlook priming – especially on bare drywall paper. Also, consider pre-tinting the primer to match closely with your chosen paint color—it can help achieve a more vibrant finish.
Essential Tools for Home Interior Painting
So, you’ve decided to take the plunge and paint your home interior. Great decision. But before you start splashing color around, make sure you have all the essential tools ready.
The first thing on your list should be quality brushes and rollers. They are a painter’s best friend. A good brush gives control over detailed work, while rollers help cover large surfaces quickly.
A Quality Brush
You’ll need a trim brush for painting edges or ‘cutting-in’. This process is usually done before rolling paint onto larger wall areas. Choose one that feels comfortable in your hand because precision matters when it comes to cutting in.
Picking the Right Roller
Rollers are ideal for covering big spaces faster with fewer strokes than brushes. The trick here is selecting the right nap – thicker naps give more texture but can leave an orange-peel effect if not used correctly.
Tape and Drop Cloths
No matter how steady your hands may be, accidents happen. Use drop cloths and painter’s tape generously to prevent any unwanted drips or spills from ruining floors or furniture.
Ladders And Extension Poles
Unless you’re as tall as a basketball player (lucky.), ladders will become indispensable tools in reaching those high spots like ceilings without straining yourself physically. The Home Depot Mobile App makes finding these supplies easier by providing image search functionality so that identifying what exactly fits into your project becomes less daunting.
With these basic essentials at hand, we promise this endeavor won’t feel too overwhelming anymore.
Note: If all of this seems too much hassle (we get it.), you might want to consider hiring professional painters. They bring their own tools, efficiency, and safety measures and can finish the project in a timely manner.
Key Takeaway:
Ready to transform your home with a fresh coat of paint? First, gather essential tools: quality brushes for detailed work and comfortable handling, the right rollers to cover large areas quickly, painter’s tape, and drop cloths for protection against spills. Don’t forget ladders or extension poles for those hard-to-reach spots. But if this task feels too daunting, remember that professional painters are always available to lend a hand.
Painting Techniques for Professional Results
You don’t need to be an expert painter to attain professional-level results. A few simple techniques can make all the difference in your painting project.
Edge Painting: Master the Art of Cutting-In
The trick is starting with the edges first. This technique, known as ‘cutting-in’, gives you crisp lines and a neat finish. Grab yourself a trim brush or an angled sash brush – it’s specially designed for this task.
If you’ve ever wondered why pros manage such straight lines around window frames and doorways, cutting in is their secret weapon. But remember, practice makes perfect, so don’t be discouraged if your first try isn’t flawless.
Rolling Paint: More Than Just Slapping It On
Moving on from the edges to the heart of your wall requires switching tools. It’s time to roll up those sleeves and bring out…the roller.
| Tips For Rolling Paint Like A Pro | |
|---|---|
| 1. | Dip just less than half of your roller into the paint, then roll it back against the tray’s ridges—this distributes paint evenly over the entire surface of the roller cover. |
| 2. | Start rolling at one end of the room, working towards the other. This ensures even coverage without missing any spots. |
By following these simple techniques, you too can achieve professional results in your home interior painting project. And remember to have fun. Painting isn’t just about the final product—it’s also about enjoying the process.
Hiring Professionals vs. DIY
When it comes to painting your home interior, you might ask: Should I roll up my sleeves and tackle this project myself or hire professional painters? Let’s weigh the advantages and disadvantages of each.
The Case for Hiring Professional Painters
Hiring professionals can offer several benefits. For starters, they bring experience and expertise that ensures a high-quality finish. They also have all the necessary tools on hand.
Moreover, seeking help from a professional painter can guarantee efficiency and safety – things that could be compromised in a do-it-yourself (DIY) approach if you’re not familiar with handling ladders or dealing with potentially hazardous materials.
Hiring pros is a great option if you’re pressed for time, as they can complete the job rapidly while still producing high-quality results. You can find qualified painters near Frederick through Pro Referral.
Diving into DIY Home Interior Painting
Moving onto DIY painting – it’s appealing too. It gives homeowners full control over every aspect of their project, from choosing paint colors to deciding when work gets done.
You save money as well since there are no labor costs involved other than perhaps treating yourself to some pizza after successfully completing each room.
A potential downside, though, lies in achieving a smooth finish, which may require multiple coats, especially if the wall color is changed drastically. The learning curve may seem steep initially, but practice makes perfect.
Maintaining Your Painted Interior
Keeping your home’s interior paint in top shape is not just about aesthetics, but it also helps extend the lifespan of the walls. It doesn’t have to be a tedious process either.
Touching Up Your Paint
From time to time, you may notice some minor chips or scuffs on your painted surfaces. Don’t worry. A quick touch-up can bring back that fresh look and protect your walls from further damage.
The key here is to use the same type and color of home interior paint. If possible, save a small amount from the original painting project for this purpose. But if that isn’t an option, most paint stores can match colors with impressive accuracy using their high-tech equipment.
A good practice when touching up is seamlessly blending new patches into old ones. This involves lightly feathering out around the edges with a dry brush after applying fresh paint over scratches or dings.
Cleaning Painted Surfaces Regularly
Dust and dirt can dull even vibrant shades over time. Regular cleaning keeps colors popping and maintains that just-painted feel longer than you might think.
To clean effectively without damaging your wall’s finish, gently dust off loose particles using a microfiber cloth or vacuum cleaner attachment; then wipe down with warm water mixed with mild dish soap (avoid harsh cleaners as they could strip away protective coatings). Always rinse thoroughly afterward to remove any residue left behind by soapy solutions – otherwise, these areas will attract more grime.
Prolonging The Life Of Your Home’s Interior Paint
When it comes to home interior paint maintenance, preventive measures are just as important. Try placing furniture and other objects a few inches away from the walls to avoid accidental scuffs or scratches. In rooms with high humidity, like kitchens and bathrooms, use an exhaust fan to help prevent moisture damage.
In addition, UV rays can fade colors over time – so consider using window coverings during peak sunlight hours for rooms that get a lot of sun exposure.
Adopting these simple practices can extend your painted interior’s lifespan while keeping your home looking its best.
Key Takeaway:
Don’t sweat the small stuff like minor chips or scuffs. You can easily fix these with a quick touch-up using the same type and color of paint. Is dust dulling your colors? No worries, just clean regularly with a gentle dust-off followed by warm, soapy water – remember to rinse well afterward. Keeping your home’s interior paint looking fresh and vibrant for longer is all about taking preventive measures.
Budgeting for Your Home Interior Painting Project
Determining the amount of paint you need may seem overwhelming. But don’t worry; we’ve got some tips to help you easily estimate paint quantities for your home interior.
Think about the dimensions of your room first. The average gallon of paint covers approximately 350-400 square feet with one coat. So halve that number if you plan on applying two coats (usually recommended).
You’ll also want to account for doors and windows in your calculations since they won’t require painting. Each door accounts for about 20 square feet, and windows are around 15 square feet.
The Cost Factor
Moving beyond quantity, it’s important to budget appropriately too. You should know that not all paints are created equal – prices vary based on quality and brand.
Suppose longevity matters to you more than immediate cost savings (and trust us, it should.). In that case, opting for higher-quality paints may be a smart move because these often offer better coverage and durability over time. This means fewer touch-ups down the line.
Saving Money without Cutting Corners
We get it – everyone loves saving money where they can. And there are ways to do this without compromising on quality when undertaking a home interior painting project.
- Do It Yourself: If feasible, doing the job yourself instead of hiring professionals could save substantial bucks while giving you control over every detail.
- Bulk Buying: Sometimes, buying larger quantities or packs offers discounts which might prove economical if multiple rooms need painting.
- Taking Advantage Of Sales & Discounts: Paint stores often have sales events during holidays or off-seasons. Planning your project around these times could yield significant savings.
But remember, it’s not just about the paint. You’ll also need to budget for tools like brushes, rollers, and painter’s tape. Don’t forget to factor in additional costs if you decide to hire professionals.
Make sure you budget accurately. It’s the key to a smooth painting process from start to finish.
Key Takeaway:
Estimating paint for your home interior is simpler than you think. Start by considering the room size and remember, a gallon of paint typically covers 350-400 square feet with one coat. Account for doors and windows as they won’t need painting. When it comes to budgeting, it’s important to realize that while high-quality paints might have a higher initial cost, they give better coverage and last longer – this means fewer touch-ups down the line.
FAQs in Relation to Painting Your Home Interior
Can I paint the interior of my house myself?
Sure, you can. With proper planning, preparation, and tools in hand, painting your home’s interior is a doable DIY project.
Is it cheaper to paint your own house interior?
Absolutely. Doing it yourself cuts labor costs. But remember, professional painters bring expertise that ensures quality work and saves time.
What order do you paint the interior of a house?
You should start with the ceiling first, tackle walls next, and finish with baseboards for an efficient workflow.
How do I start painting my interior house?
To kick off your painting project right, begin by preparing the space: clean the walls thoroughly and remove any obstacles before starting to paint.
Conclusion
Painting your home interior isn’t just a task; it’s an adventure. A journey that transforms not only walls but how you feel in each room.
You’ve studied how to ready your area, making sure every corner is set for the new layer of paint. You now know the order of painting matters – from ceiling to baseboards – and why mixing paint can make all the difference.
You discovered essential tools for the job and pro techniques like cutting in edges before rolling out the inner parts of walls. But most importantly, you grasped when DIY makes sense versus calling in professional help.
Maintaining those freshly painted surfaces? No problem! And budgeting? You’re set with practical advice on estimating quantities and costs upfront.
Your home awaits its transformation!
Frederick Painting & Supply, Inc. offers residential interior painting services to homeowners who are considering an interior painting project. Each step we made has been carefully curated to ensure a professional result, from preparing the room and protecting your furniture to the order in which you should paint surfaces and the importance of high-quality equipment. With our expertise, we can confidently and efficiently transform your home’s interior. Remember, a fresh coat of paint enhances your home’s aesthetic appeal and contributes to its overall value. Get an estimate today!

Shawn Zimmerman started painting in the summer of 1991, the year before he graduated high school. Shawn decided to pursue his career in the family business and continued to develop his skills in the trade while also developing the necessary skills to manage the business. Shawn enjoys being outdoors, canoeing, camping, hiking, hunting, fishing and spending time with family.

