
Understanding the Key Factors That Impact Painting Service Costs at Frederick Painting Company
October 29, 2025
Ballenger Creek Townhome Painting – A Refresh Buyers Actually Notice
November 11, 2025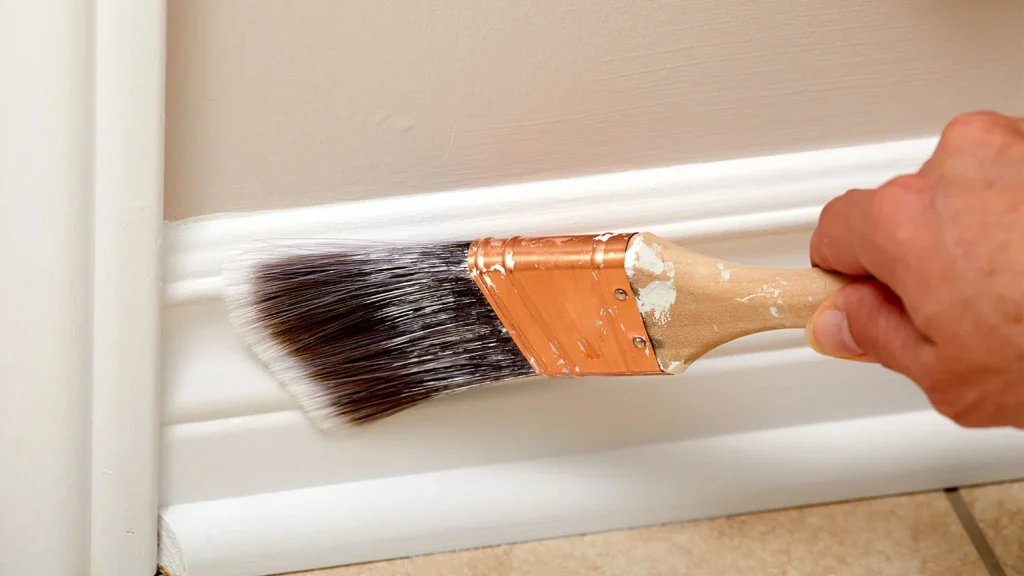
Suppose your baseboards, door casings, or exterior fascia are starting to look tired. In that case, you’re likely asking the same question many local homeowners do: Is repainting enough, or is it time to replace? This guide walks you through a simple, no-drama way to decide—using real-world thresholds a seasoned Walkersville House Painter would use on assessments.
To keep this ultra-skimmable, you’ll find short sections, quick checklists, and plain language. By the end, you’ll know what to look for, what to fix, and how to plan a clean, durable result for your home in Walkersville.
The quick answer
- Repaint when the trim is structurally sound: no deep rot, solid fasteners, minor dents or hairline cracks, and paint failure limited to the surface.
- Replace when damage has compromised the material: deep rot, swelling, flaking that returns after proper prep, wavy or split profiles, or chronic moisture from leaks.
- Hybrid when 80–90% is sound: selectively replace the worst boards or pieces, then repaint all for a seamless finish.
What trim actually does (and why it fails)
Interior trim (baseboards, door and window casings, crown) hides gaps, protects walls from bumps, and frames the architecture. It usually fails from scuffs, vacuum hits, pet claws, furniture nicks, and occasional humidity swings.
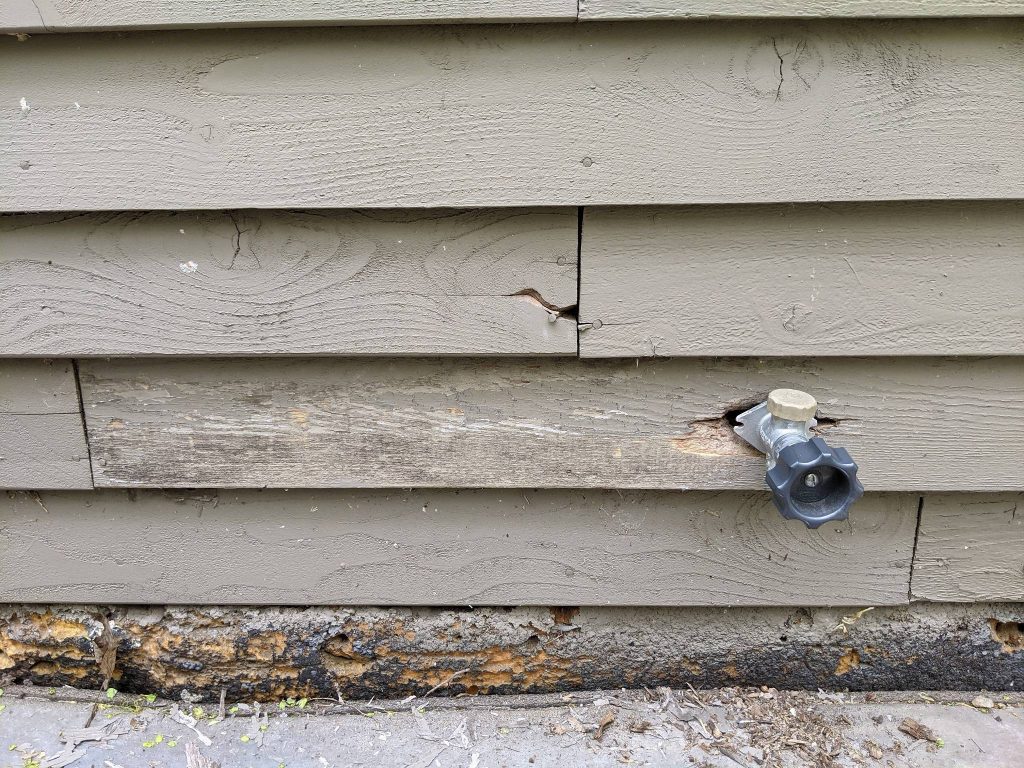
Exterior trim (fascia, soffits, rake boards, corner boards, water tables) protects edges and transitions. It fails from UV exposure, wind-driven rain, clogged gutters, failed caulk, and aging paint films.
Failure often begins at joints and end-grain—where water sneaks in, caulk dries, and the sun beats hardest. Once moisture cycles start, paint loses adhesion, boards swell, and decay accelerates.
A Walkersville-specific lens
Walkersville, with its blend of established homes and newer builds, presents unique challenges for trim maintenance. Local factors such as seasonal swings, mature trees, and resale expectations influence your decision.
- Seasonal swings: Hot summers, freezing winters. Expansion and contraction test joints and caulk.
- Mature trees and shade: Moss and dampness can linger on north-facing trim.
- Gutters and leaf load: Overflowing gutters are a top driver of fascia rot.
- Resale expectations: Fresh, tight trim is a small upgrade that reads as “well cared for” in listings.
Repaint vs. replace: a simple field test.
Use a small pick or an awl, and use your fingertips. Check these zones first: lower baseboards near entryways, tub/shower surrounds (if trimmed), door bottoms, exterior fascia near downspouts, and window sills.
Signs you can repaint
- Paint chalks or peel, but the wood beneath is firm to the probe.
- Minor dents that fill easily; edges are still crisp.
- Hairline drywall cracks at casing corners; caulk failure is localized.
- MDF interior trim with surface swelling only at the very bottom, not flaking apart.
- PVC or fiber-cement exterior trim with faded but intact coating.
Signs you should replace
- Soft spots where the pick sinks in.
- Deep checking/splitting across the grain; edges are spongy.
- End-grain rot on window sill noses or fascia ends.
- MDF delamination—puffed layers that crumble.
- Repeated failures: You sanded/primed last year, and it’s peeling again—usually a sign of trapped moisture or a degraded substrate.
- Warped profiles that won’t sit flat, even after refastening.
The hybrid approach that saves money (and looks best)
Most homes don’t need an all-or-nothing choice. A practical hybrid plan:
- Replace the worst 10–30%: rotted sill noses, fascia near gutters, a few casings or baseboard runs.
- Repair solid pieces: fill, sand, prime, caulk.
- Repaint the entire area for a uniform sheen and color so old and new blend seamlessly.
This method controls the budget while delivering a “full refresh” appearance.
Material matters: wood, MDF, and PVC/fiber-cement
Wood
- Pros: Classic look, takes detail and paint beautifully, easy to repair with epoxy.
- Watch-outs: End-grain wicks moisture; needs sharp prep and the right primer. For the exterior, good gutters and caulk are non-negotiable.
MDF (interior)
- Pros: Smooth, affordable, consistent profiles; paints to a glassy finish.
- Watch-outs: Vulnerable to water. If your mudroom or bath has frequent splashes, consider wood there instead.
PVC or fiber-cement (exterior)
- Pros: Highly resistant to rot and insects; stable in wet zones and near grade.
- Watch-outs: Needs proper fastening and compatible fillers. Paint still matters for UV resistance and color uniformity.
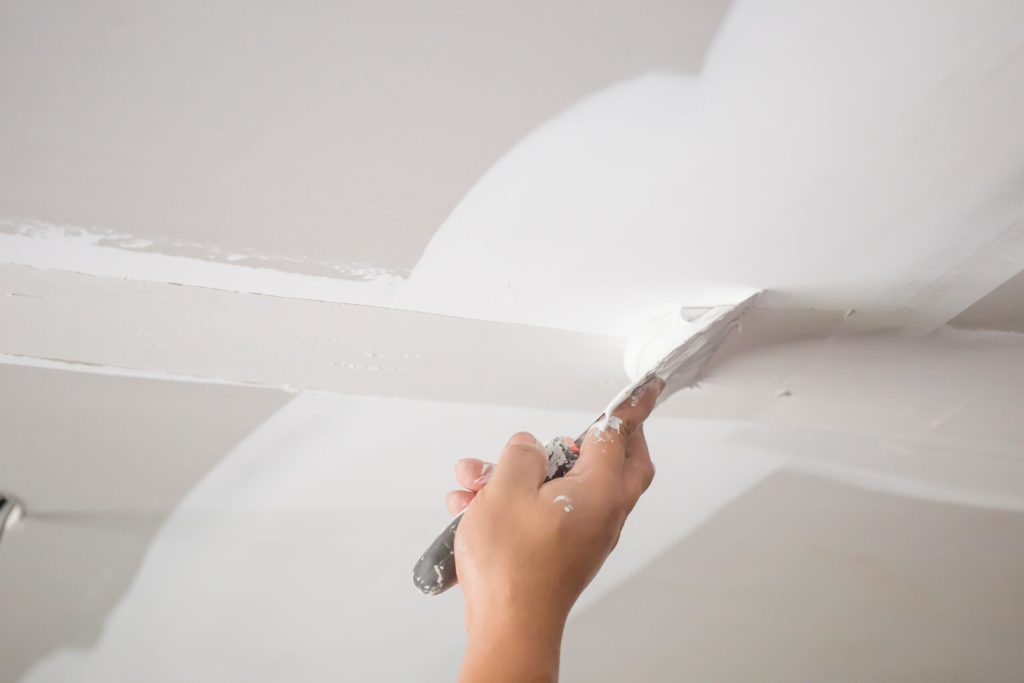
Paint systems that actually last
When repainting, think in systems, not just “paint.”
- Surface cleaning: Degrease interiors (kitchens, hand oils on casings). Mildew-wash exteriors.
- Sanding and deglossing: Knock down sheens; feather edges of chips so the transition is invisible.
- Primers:
- Stain-blocking for water marks and tannin bleed (wood).
- Bonding for glossy or previously oil-based trim you’re converting to waterborne.
- Exterior primers that seal end-grain and knots.
- Caulking: High-quality, paintable, with stretch. Tool it smooth and don’t overfill.
- Topcoats:
- Interior: Durable enamel in satin or semi-gloss for wipe-ability.
- Exterior: Resilient acrylics designed for UV and weather, matched to primer for compatibility.
Sheen’s choices that hide or highlight
- Semi-gloss: Classic for trim; reflects more light and wipes clean. Shows imperfections more.
- Satin: A touch softer; still cleanable but kinder to slightly rough profiles.
- Matte/Flat sheen is rare for trim, but it’s the right choice when the design demands minimal reflection and the surface is flawless.
Color strategy that frames your architecture
- Match or contrast? Matching walls creates a modern, quiet envelope; contrasting trim outlines doorways and windows, and feels traditional.
- Warm vs. cool whites: Pair to the room’s fixed elements—floors, counters, tile—to avoid clashing undertones.
- Exterior alignment: Tie fascia and trim to the roof, gutters, and siding undertone. A crisp, slightly warm white can soften cool siding; a cooler white sharpens warm tones.
Interior situations: repaint or replace?
Baseboards battered by life
- If the profile is intact and the edges are still straight, fill dents, re-caulk the top line, and repaint.
- If vacuum hits have snapped corners or the run is wavy, replace the damaged section. Consider a taller profile to resist future bumps.
Bathroom casings with moisture stains
- Light stains: sand, stain-blocking primer, and enamel.
- Puffy MDF edges or blackened soft wood: cut out and replace. Improve fan usage and seal tub/shower splashes.
Historic detailing
- Keep original profiles when possible—repair with wood epoxy and splice-in sections rather than wholesale replacement. Color and sheen will unify the look.
Exterior situations: repaint or replace?
Fascia near gutters
- If the gutter overflowed and stained, but the wood is firm after drying, prime with a penetrating exterior primer and repaint.
- If edges are soft or the board caves at the fasteners, replace that run, correct the gutter pitch, and extend downspouts.
Window sills and brickmold
- Hairline checks: sand, prime, and repaint; add a thin bead of caulk at joints.
- Split noses or punky ends: replace split noses; consider rot-resistant materials for the lower portions.
Bottom trim near grade
- If mulch touches wood, lift it away. Persistent moisture + flaking = replacement with PVC or fiber-cement and a proper drip detail.
A five-step decision checklist
- Probe: Test suspect spots—if it’s firm, you’re likely in repaint territory.
- Scan joints: Failed caulk is normal; widespread open joints plus movement suggest replacement for stable alignment.
- Assess moisture source: Fix the cause (gutter, splash, condensation). Repainting without correction is short-lived.
- Consider profile integrity: Crisp edges and flat planes repaint well; warped, swollen, or crumbling edges need replacement.
- Plan the finish: If your target is a flawless, bright semi-gloss, replacement may be worth it for heavily damaged surfaces.
Budget planning without surprises
While exact numbers vary by scope and material, the cost curve typically looks like this:
- Prep + repaint (least expensive): Best when 80–100% of trim is sound.
- Hybrid (moderate): Replace the worst sections, then repaint all for uniform results.
- Full replacement (highest): Strategic when rot is widespread, profiles don’t match, or you’re upgrading to moisture-proof materials.
A clear written scope should list: which pieces are being replaced, materials (wood, MDF, PVC), prep steps, number of coats, primer type, caulk brand/type, and warranty terms.
Timeline and disruption
- Interior: One to several days per floor, depending on repairs, drying, and sanding between coats. We sequence spaces to keep walkways usable.
- Exterior: Weather matters. Expect a set-up day (protect landscaping, mask), repair day, priming, and topcoats. Gutters and windows remain accessible as much as possible.
Clean work that respects your home
- Masking and floor protection come first and last.
- HEPA vacuuming after sanding.
- Safe lead practices in older homes when disturbance is possible.
- Label leftover paint for future touch-ups.
Small upgrades that elevate the result
- Profile changes: If you’re replacing sections, consider moving from a 2¼” base to a 3½” base, or adding a simple shoe molding for a finished, gap-free look.
- Back band or stop detail: Around doors/windows, a subtle add-on boosts depth.
- Color tweak: Slightly warmer or cooler trim white can balance the room’s fixed finishes.
Case-style examples (Walkersville scenarios)
Maple Avenue cape with scuffed baseboards
- 70% scuffs, 30% chipped corners. Baseboards are straight.
- Plan: epoxy corner repairs, sand, prime, new caulk line, satin enamel. Result: crisp edges, low-glare finish, easy cleaning.
Split-level near Heritage Farm Park with fascia stains
- Overflowing gutters left streaks; wood probes firm except near one splice.
- Plan: replace a short fascia section, correct gutter pitch, prime all end-grain, and apply two finish coats. Result: uniform sheen, no visible splice, water managed.
Townhome with MDF casings at patio door
- Splash zone swelled the lower edges.
- Plan: replace lower casing legs with wood, keep head in MDF, prime with bonding primer, and caulk transitions. Result: moisture-tolerant legs, seamless paint match.
DIY or hire a pro?
DIY is reasonable when:
- Damage is purely cosmetic.
- You own the right sanding, priming, and caulking tools.
- You can accept a few brush marks or minor texture differences.
Bring in a pro when:
- The moisture source is unclear or ongoing.
- There’s rot, delamination, or widespread failure.
- You want a durable enamel finish with tight lines, minimal mess, and predictable timing.
If you’d like a local assessment, you can start with a quick look from a Walkersville House Painter to confirm whether repainting or replacing your trim will yield the best result.
How we handle a trim project from start to finish
- Walkthrough & notes: Identify replacement vs. repair candidates; flag moisture sources.
- Proposal: Clear itemization of materials, prep, and coatings.
- Protection: Masking, floor covers, plant wraps where needed.
- Repairs: Selective replacement; epoxy and patch work elsewhere.
- Prep: Clean, sand, vacuum, prime, re-caulk.
- Paint: Targeted primer where needed, plus full topcoats for even sheen.
- Detailing: Final line checks, hardware wipe-downs, labeled touch-up cans.
- Walkthrough: Review and care tips.
Maintenance that keeps trim looking new
- Wipe high-touch zones (casing around light switches, stairway walls) with a gentle cleaner.
- Spot caulk tiny seasonal gaps before they grow.
- Touch-up dings sooner or later; fresh paint blends better.
- Keep gutters clear and splash zones dry to prevent exterior failures.
When repainting is the smarter long game
Even if your home has a few blemishes, repainting is often the smarter move when the material is sound. You get:
- Lower cost than full replacement
- Faster turnaround with less disruption
- Design flexibility with updated sheen and color
- Uniform refresh that photographs well for resale
When replacement pays off
Replacement earns its keep when:
- Damage is structural, or moisture is chronic
- Profiles are mismatched, and you want consistency
- You’re upgrading the exterior lower trim to PVC near grade
- You want a new look—taller baseboards, bolder casings, or simplified profiles
Trim frames for every view in your home. If it’s solid, a careful repaint brings it back to life. If the substrate is failing, selective or full replacement avoids chasing problems. Either path, done with the right prep and products, leaves you with crisp lines, clean edges, and a finish that stands up to daily life in Walkersville.
FAQs
1) How do I tell if peeling paint hides rot?
Probe with a small pick. If the tool stops at a firm surface, you’re likely seeing failed paint, not failed wood. If it sinks in or the surface flakes, that’s a sign of decay and likely a need for replacement.
2) Can MDF trim be saved after water damage?
If swelling is light and limited to the surface, it can sometimes be sanded and sealed with a bonding primer. Puffy, crumbling, or layered edges usually mean replacement—often switching those pieces to wood in splash zones.
3) What sheen should I choose for families with kids and pets?
Semi-gloss is classic and easy to wipe. Satin offers a slightly softer look and hides small flaws better. Both are good in high-traffic areas.
4) Do I need to repaint all the trim if I replace only a few pieces?
It’s best to. New pieces can reflect light differently. Painting the full run creates a uniform color and sheen, so old and new read as one.
5) How often should exterior trim be repainted in Walkersville?
A 5–8-year interval is common, but sun exposure, gutter health, and caulk condition can shift that. North-facing or shaded, damp areas may need attention sooner.

Shawn Zimmerman started painting in the summer of 1991, the year before he graduated high school. Shawn decided to pursue his career in the family business and continued to develop his skills in the trade while also developing the necessary skills to manage the business. Shawn enjoys being outdoors, canoeing, camping, hiking, hunting, fishing and spending time with family.


